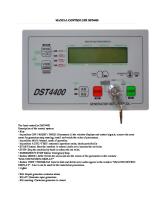
Manual - WS Controller (02250165-411)
WS CONTROLLER INSTRUCTION MANUAL KEEP FOR FUTURE REFERENCE Part Number 02250165-411 ©Sullair Corporation AIR CARE SE
Views 424 Downloads 5 File size 354KB
Recommend stories


- Author / Uploaded
- Philip Shaver
Citation preview
WS CONTROLLER
INSTRUCTION MANUAL KEEP FOR FUTURE REFERENCE Part Number
02250165-411 ©Sullair Corporation
AIR CARE SEMINAR TRAINING Sullair Air Care Seminars are courses that provide hands-on instruction in the proper operation, maintenance and service of Sullair equipment. Individual seminars on Industrial compressors and compressor electrical systems are presented at regular intervals throughout the year at a dedicated training facility at Sullair’s corporate headquarters in Michigan City, Indiana. Instruction includes discussion of the function and installation of Sullair service parts, troubleshooting of the most common problems, and actual equipment operation. The seminars are recommended for maintenance and service personnel.
For detailed course outlines, schedule and cost information contact:
Sullair Corporate Training Department 1-888-SULLAIR or 219-879-5451 (ext. 5363) www.sullair.com Or Write -
Sullair Corporation 3700 E. Michigan Blvd. Michigan City, IN 46360 Attn: Service Training Department
TABLE OF CONTENTS
OPERATOR IS REQUIRED TO READ ENTIRE INSTRUCTION MANUAL
1. SAFETY .............................................................................................................................................................. 1 1.1 INTRODUCTION....................................................................................................................................... 1 1.2 ELECTRICAL SHOCK .............................................................................................................................. 1 1.3 VARIABLE SPEED DRIVE........................................................................................................................ 1 1.4 DECALS .................................................................................................................................................... 1 1.5 EMERGENCY STOP ................................................................................................................................ 2 2. STARTUP PROCEDURES................................................................................................................................. 5 2.1 INTRODUCTION....................................................................................................................................... 5 2.2 WS CONTROLLER PANEL LAYOUT....................................................................................................... 5 2.3 WS START UP PROCEDURES ............................................................................................................... 6 2.3.1 COMPRESSOR MOTOR ROTATION DIRECTION CHECK (at installation)................................ 6 2.3.2 FAN MOTOR ROTATION CHECK (at installation)........................................................................ 6 2.3.3 INITIAL START-UP AFTER INSTALLATION ................................................................................ 6 2.3.4 SUBSEQUENT START-UP PROCEDURE ................................................................................... 7 2.4 SHUTDOWN PROCEDURE ..................................................................................................................... 7 3. ADJUSTMENTS ................................................................................................................................................. 9 3.1 INTRODUCTION....................................................................................................................................... 9 3.2 COMPRESSOR ADJUSTMENT PROCEDURES..................................................................................... 9 3.3 USER ADJUSTABLE CONTROL PARAMETERS.................................................................................. 10 3.4 CALIBRATION OF P2 PRESSURE TRANSDUCERS ........................................................................... 12 3.5 REMOTE UNLOAD ................................................................................................................................. 12 4. WS CONTROLLER DESCRIPTION................................................................................................................. 13 4.1 INTRODUCTION..................................................................................................................................... 13 4.2 TOUCH PAD BUTTON DESCRIPTION.................................................................................................. 13 4.3 INDICATOR LED DESCRIPTION ........................................................................................................... 13 4.4 DISPLAY SCREEN ................................................................................................................................. 14 4.4.1 NORMAL VIEW ........................................................................................................................... 14 4.4.2 COMPRESSOR STATUS VIEW ................................................................................................. 14 4.4.3 COMPRESSOR ADJUSTMENT VIEW – CONTROL PARAMETERS........................................ 15 4.5 OPERATING MODES ............................................................................................................................. 15 4.6 OPERATING STATES ............................................................................................................................ 16 4.7 NORMAL VIEW SERVICE REMINDERS ............................................................................................... 18 4.8 WARNING MESSAGES.......................................................................................................................... 18 4.9 FAULT MESSAGES................................................................................................................................ 19 5. TROUBLESHOOTING...................................................................................................................................... 23 5.1 TROUBLESHOOTING INTRODUCTION ............................................................................................... 23 5.2 TROUBLESHOOTING GUIDE................................................................................................................ 24 5.3 MACHINE BEHAVIOR AFTER A POWER Interruption.......................................................................... 27
TABLE OF CONTENTS 5.4 Battery ..................................................................................................................................................... 27 6. VARIABLE SPEED DRIVE............................................................................................................................... 28 6.1 SAFETY................................................................................................................................................... 28 6.2 OVERVIEW ............................................................................................................................................. 29 6.3 INSTALLATION....................................................................................................................................... 31 6.4 WS CONTROLLER DISPLAY AND MENUS .......................................................................................... 31 6.4.1 VSD STATUS .............................................................................................................................. 33 6.4.2 VSD CONTROL PARAMETERS ................................................................................................. 33 6.4.3 WSPC Interface Application - VSD.............................................................................................. 33 6.5 STARTUP OF NEW VSD COMPRESSOR PACKAGE .......................................................................... 33 6.6 VSD COMPRESSOR TROUBLESHOOTING......................................................................................... 34
Section 1
SAFETY 1.
1.1
SAFETY
INTRODUCTION Sullair Corporation and its subsidiaries design and manufacture all of their products so they can be operated safely. However, the responsibility for safe operation rests with those who use and maintain these products. For safe machine operation it is vitally important to review all safety precautions noted in the Safety Section of the compressor’s Operator’s Manual. The precautions listed in the Operator’s Manual, as well as those noted here are offered as a guide which, if conscientiously followed, will minimize the possibility of accidents throughout the useful life of this equipment. The compressor should be operated only by persons who have been trained and delegated to do so, and who have read and understood this manual and the compressor Operator’s Manual. Failure to follow the instructions, procedures and safety precautions listed here and in the Operator’s Manual may result in accidents and injuries. NEVER start the compressor unless it is safe to do so. DO NOT attempt to operate the compressor with a known unsafe condition. Tag the compressor and render it inoperative by disconnecting and locking out all power at the source, or disable its prime mover so others who may not know of the unsafe condition cannot attempt to operate it until the condition is corrected. Use and operate the air compressor only in full compliance with all pertinent OSHA requirements or any pertinent Federal, State, and Local codes or requirements. DO NOT modify the compressor and/or controls in any way except with written factory approval.
1.2
ELECTRICAL SHOCK A. Keep all parts of the body, any hand-held tools, or other conductive objects away from exposed live wiring and components of the electrical system. Maintain dry footing, stand on insulated surfaces and DO NOT contact any other portion of the compressor when making adjustments or repairs to exposed live components of the electrical system.
All field equipment must be tested for electrostatic fields prior to servicing or making contact with the machine using the following or equivalent test equipment: • 90-600 VAC : Volt detector such as Fluke Model 1AC-A • 600-7000 VAC : Voltage detector such as Fluke Networks Model C9970 It is the responsibility of each organization to provide/arrange trainng for all their associates expected to test for electrostatic fields.
B. Attempt repairs only in clean, dry, well lighted and well ventilated areas. C. Stay clear of the compressor during electrical storms.
1.3
VARIABLE SPEED DRIVE Refer to Section 6.1 for safety information on variable speed drive products.
1.4
DECALS The WS Controller panel displays several decals which provide necessary information for safe performance. See Figures 1.1A and 1.1B. These decals should never be removed 1
Section 1 SAFETY or modified. If a decal becomes damaged, contact your nearest Sullair Distributor or the Sullair Corporation factory Service Department for replacement parts. Note: When ordering new decals, use part number printed on the decal face.
1.5
EMERGENCY STOP A large red Emergency Stop (E-STOP) button is located near the controller panel. Press the E-STOP button in the event of an emergency to immediately shutdown the machine and override all controller functions. The E-STOP button must be reset prior to restarting the machine. When hazardous conditions no longer exist, reset the E-STOP by turning the button ½ turn to the right. The button will release. Press the Stop the controls. The machine will be ready for restart.
Figure 1.1A Safety Decals and Part Numbers
2
pad to reset
Section 1
SAFETY Figure 1.1B Safety Decals and Part Numbers 1 2
decal, warning auto start decal, danger breath air (I)
250017-903 250027-935
1 1
3
sign, warning “food grade” lube
250003-144
1
4
decal, auto start
041065
1
(I) OSHA and FDA guidelines are superseded by any Federal, State or Local regulations whenever applicable.
3
Section 1 SAFETY NOTES
4
Section 2
STARTUP PROCEDURES 2.
2.1
STARTUP PROCEDURES
INTRODUCTION This compressor is equipped with an WS Controller for controlling the compressor system operation, setting the machine parameters and performing maintenance operations. The WS Controller is designed for the safe operation and protection of the compressor system. When fault conditions occur, the controller automatically shuts down the machine before the conditions can cause damage to the equipment. The WS Controller also contains features that enable sequential interface with other machines.
2.2
WS CONTROLLER PANEL LAYOUT The WS Controller panel is shown in Figure 2.1. The controller panel consists of : •
Display Screen for displaying machine status
•
START
•
pad for stopping machine operation and for clearing fault messages STOP while the machine is stopped
•
UP arrow and DOWN arrow pads for navigation through the various panel displays and for changing parameter values
•
ENTER values
•
Machine status indicator lights for identifying the current machine operational status.
pad for machine startup
pad for selecting and accessing various screen displays and for entering
Each of the controller components and functions is described in detail in Section 4. Figure 2.1 WS Controller Panel
DISPLAY SCREEN START PAD
STOP PAD ENTER PAD UP ARROW PAD FAULT INDICATOR (RED)
POWER ON INDICATOR (GREEN) MAINTENANCE INDICATOR (AMBER)
DOWN ARROW PAD
AUTO MODE INDICATOR (GREEN)
5
Section 2
STARTUP PROCEDURES 2.3
WS START UP PROCEDURES
2.3.1
COMPRESSOR MOTOR ROTATION DIRECTION CHECK (at installation) After the compressor has been installed and the electrical wiring is completed, perform following steps to verify the direction of the compressor motor rotation. pad twice to 1. If the display screen shows “AUTOMATIC”, press the UP arrow pad. The screen will display navigate to the Mode parameter. Press the ENTER reverse characters indicating change mode is active. Press the down arrow pad to highlight the “MANUAL” selection (it will appear in reverse text in the display). Press the ENTER pad to accept the change and place the machine in the Manual operating mode. 2. Press the START compressor.
and STOP
pads in succession to “bump start” the
3. Observe the direction of the compressor motor shaft. When looking at the motor from the end opposite the compressor unit, the shaft should be turning clockwise on all gear driven models, and counterclockwise on direct drive models. A “Direction of Rotation” decal is located on the coupling guard between the motor and compressor to show proper motor/compressor rotation. 4. Disconnect and lockout power according to lockout/tagout procedure. 5. If the motor shaft is not turning in the proper direction, disconnect the power to the starter and exchange any two of the three power input leads. Refer to the Compressor Operator’s Manual. 6. Perform above steps 1 - 3 again to confirm proper motor/compressor rotation.
NOTE Variable speed drive (VSD) packages do not require a main motor direction check since the variable speed motor is set at the time of manufacture. 2.3.2
FAN MOTOR ROTATION CHECK (at installation) The VSD fan direction is affected by installation. Verify the correct fan rotation using the following steps: 1. With the compressor running, visually check that the fan rotation is correct. 2. If it is incorrect, change the direction of the fan motor by disconnecting power from the compressor. 3. Disconnect and lockout power according to lockout/tagout procedure. 4. Exchange any two of the three fan motor leads at the fan motor starter. Refer to the compressor Operator’s Manual. 5. Recheck the direction of the fan motor.
2.3.3
INITIAL START-UP AFTER INSTALLATION Perform the following procedure at the initial start-up of the compressor following installation.
6
Section 2
STARTUP PROCEDURES 1. Verify that all preparations and checks necessary for proper installation have been made. Refer to the compressor Operator’s Manual. 2. Read the preceding pages of this manual thoroughly. 3. Slowly open the shut-off valve to the service line. 4. Press the START pad to start the compressor. Compressor will begin operating in the default mode (Automatic) set at the factory. 5. Check for possible leaks in piping. 6. Slowly close the service line shut-off valve to verify nameplate pressure unload setting is correct. The compressor should unload when nameplate pressure is achieved. If adjustments are necessary, see compressor Operator’s Manual. 7. Observe the operating temperature. Refer to compressor Operator’s Manual for acceptable operating range. If temperature exceeds this range, check the cooling system and installation environment. 8. Open the shut-off valve to the service line. 9. After operating the machine for 24 hours, inspect the compressor for fluid leaks and proper operating temperature. 2.3.4
SUBSEQUENT START-UP PROCEDURE 1. On subsequent start-ups, check the fluid sight glass for proper fluid level. Service if necessary. See compressor Operator’s Manual. 2. Press the START pad on the display screen. The machine will prepare to start up in the last operating mode existing at shutdown. The current Machine mode will appear on the display screen. 3. If a different operating mode is desired, use the arrow pads to navigate to the Mode parameter. Press the ENTER pad to enter the Change Mode. Navigate to the pad to accept and save desired mode (Automatic or Manual). Press the ENTER the mode setting. 4. When the compressor is running, observe the display panel and maintenance indicators to ensure the values displayed are within the proper ranges.
2.4
SHUTDOWN PROCEDURE Shut down the compressor by pressing the STOP panel.
pad on the WS Controller
NOTE The system may require sump blowdown (typically below 10 psi) to be completed prior to restarting.
7
Section 2
STARTUP PROCEDURES The compressor may restart automatically after a power failure or after the E-Stop button has been reset.
8
Section 3 ADJUSTMENTS 3.
3.1
ADJUSTMENTS
INTRODUCTION This section describes steps for using the WS Controller to modify specific parameters that control the machine operation.
NOTE Control parameters described in this manual are those which can be adjusted via the WS controller. Additional parameters that control the operation of the compressor and sequencing of multiple machines can be viewed and edited using the WSPC Software program. See the WSPC User Interface Manual for more details.
Typically, the top line of the Controller Display Screen will display the line pressure and compressor temperature; the bottom line will display the current operating mode. As the user presses the down navigation arrow, the screen will display various machine statistics appearing under the heading “Compressor Status”. These values are not adjustable at the WS Controller. Navigating past these screens, the first line of the screen will display the words “Show Settings-------“. This indicates that the controller is in the Adjustment mode. When in Adjustment mode, control parameters will be described in the second line of the display screen. These control parameters can be modified by the user. The bottom line of the display will show the current value or setting of the control parameter. Section 3.2 provides general steps to modifying the compressor control parameters. A description of each user modifiable parameter is provided in Section 3.3.
3.2
COMPRESSOR ADJUSTMENT PROCEDURES The following steps apply while “Show Setting------- “ is indicated in the display. The control parameter described in the display can be modified by the user. Use these steps to modify a parameter value: arrow or DOWN 1. Press the UP the parameter to be change.
arrow pad on the controller panel to navigate to
pad to select the parameter and access the CHANGE mode. 2. Press the ENTER The change mode is indicated by the text “Change Setting -------” appearing in reverse (negative) characters on the top line of the display. The parameter name will appear on the second line and the current parameter value or setting will appear in reverse characters on the bottom line. 3. Use the UP parameter.
arrow or DOWN
arrow pad to change the value or mode of the
to 4. When the desired value or mode name appears on the display, Press ENTER accept and save this new value for the selected parameter. The display will return to the ADJUSTMENT view and the new value or mode will be displayed. 5. Press the START
pad to return the display to the NORMAL view.
9
Section 3 ADJUSTMENTS NOTE or STOP pad is If during the adjustment process, the START pressed prior to pressing the ENTER pad, the display will return to the NORMAL view and the parameter value will not be changed.
3.3
USER ADJUSTABLE CONTROL PARAMETERS Listed below are descriptions of the parameter that can be adjusted at the WS Controller: Unload Pressure - Set point (psi, bar, or kpa) at which the system pressure will begin unloading. For example if this parameter is set to 110 psi (7.6 bar) the machine will unload when the line pressure is above 110 psi (7.6 bar). Load Delta Pressure - The pressure differential (psi, bar, or kpa) below the unload pressure at which the machine will begin loading. For example if the unload pressure is set to 110 psi (7.6 bar) and the load differential is set to 10 psid (0.7 bar), the machine will load when the line pressure goes below 100 psi (6.9 bar). VSD Setpoint Pressure - (VSD packages only) The targeted pressure (psi, bar, or kpa) for the variable speed controls. This is normally adjusted near the bottom of the load/unload delta. The speed will be adjusted to maintain this pressure. Refer to Section 6 for additional details. Unload Minutes - Set time that the machine will run unloaded in Auto mode before shutting off. If the time is set less than 15 minutes (for example 5), there may be times when the machine will run unloaded for more than 15 minutes. This is because there is another timer that keeps the machine from being started more than four times an hour. This secondary timer is disabled when a machine is configured for VSD motor control. Drain Interval Mins. - Set interval in minutes between activation of the drain cycle for machines equipped with an electric solenoid drain. This does not apply to the Sullair SCD zero loss drain, which is not controlled or monitored by the WS Controller. Drain Time Seconds - Set time in seconds that the drain remains energized. Wye Delta Seconds - Set time for wye to delta starter transition. Also used to control the closed inlet start valve. Disable by setting to zero (0), standard for full voltage start. Requires approximately 4-6 seconds for wye-delta or solid state starting. Modulate - Manner in which the machine is set to regulate compressor flow. Default state is “YES” for proportional control. Select “NO” for Load/No Load operation. Operating Mode - The mode set for controlling the compressor motor operation (Manual / Automatic). Language - The choice of language for text that will appear on the display screen (English, French, Spanish, German, Italian, Chinese). The Diagram of Figure 3.1 shows the flow of the screens that appear on the WS Controller display screen. This diagram illustrates how adjustment parameters are accessed.
10
Section 3 ADJUSTMENTS Figure 3.1 Controller Display Flow Diagram
NORMAL VIEW Compressor Status: Temperature 1 Compressor Status: Sump Pressure Compressor Status: Line Pressure Compressor Status: Separator Pressure Δ Compressor Status: Run Hours Show Setting Unload Pressure
(ENTER)
Change Setting Unload Pressure
Show Setting Load Delta Pressure
Change Setting Load Delta Pressure
Show Setting Unload Minutes
Change Setting Unload Minutes
Show Setting Drain Interval Mins.
Change Setting Drain Interval Mins.
Show Setting Drain Time Seconds
Change Setting Drain Time Seconds
Show Setting Wye Delta Seconds
Change Setting Wye Delta Seconds
Show Setting Modulate
Change Setting Modulate
Show Setting Operating Mode
Change Setting Operating Mode
Show Setting Language
Change Setting Language
11
Section 3 ADJUSTMENTS 3.4
CALIBRATION OF P2 PRESSURE TRANSDUCERS The compressor is equipped with a pressure transducer that measures the output line (P2) pressure. Over time, the pressure transducer may vary slightly producing an inaccurate reading at the controller. Periodically and prior to operating multiple controllers in a sequence, the controller should be re-calibrated to reflect the same measurement of P2 pressure through out the system. The re-calibration is best done when the system is at a stable pressure. Calibration of the WS Controller P2 pressure reading is accomplished using the WS PC User Interface Software Program. Refer to the WS PC User Interface Manual for details on calibrating the P2 system pressure measurement.
3.5
REMOTE UNLOAD As a default configuration, the compressor is provided with one input to allow userfurnished external remote control. This may be wired to a remote switch, timer, or other controls to halt operation of the compressor as desired. To enable remote control of the compressor: 1.
Wire the remote contact to junction J4-7 and any vacant J3 terminal.
2.
Access the PC User Interface software. At the User Adjustments display screen, select one of the following sequencing modes: “Remote”, “Hours”, or “Com Number”. Remote operation is disabled if the sequencing mode is “Disabled” or “Slave”.
3.
Once enabled, the controller will respond to the wired input.
•
If the contact is closed, the compressor unloads and stops delivering air to the system. If the operating mode is AUTOMATIC, the compressor will stop after running unloaded for the period set in the “Unload Minutes” setting. When operating in a group of sequenced compressors, this removes only this compressor for service.
•
If the contact is open, the compressor operates normally.
The WS Controller is field configurable for other remote functions with additional contacts or fieldbus commands. Refer to the specialized equipment documentation for details.
12
Section 4 WS CONTROLLER DESCRIPTION 4.
4.1
WS CONTROLLER DESCRIPTION
INTRODUCTION This section describes the components of the WS Controller, the function of each component, and the various types of displays that may appear on the display screen. Descriptive lists of all messages appearing in the display are also provided.
4.2
TOUCH PAD BUTTON DESCRIPTION The WS Controller Panel has five touch pads that allow the operator control of the compressor and enable adjustment of the machine operating parameters. Each touch pad and its functions are described below: Start Pad - Large green pad button used to start the compressor operation. The pad is also pressed to reset warnings and service reminders while the machine is running and to return the display to the Normal View. - Large red key pad used to stop the compressor operation. The Stop Pad Stop pad is also pressed to clear fault messages when the machine is stopped and to return the display to the Normal View. Up Arrow Pad - Used to navigate “up” the list of display messages and to increase or change parameter values for adjustments. Down Arrow Pad - Used to navigate “down” the list of display messages and to decrease or change parameter values for adjustments. - Angled arrow key pad used to select the parameter that is displayed Enter Pad on the screen. After adjusting the desired parameter value using the UP or DOWN arrow pads, the ENTER pad selects the parameter value displayed on the screen and saves it as the new value.
4.3
INDICATOR LED DESCRIPTION Four LED’s on the WS Controller Panel provide indication of the general state of the machine. Power On Indicator (GREEN LED) - Lights whenever power is applied to the controller. This LED will blink very slowly if the compressor is set to automatically restart after power failure. (GREEN LED)- Lights when the Automatic or Manual Mode Indicator compressor operation is set to start and run automatically. This LED lights steadily when the motor is running. The LED will blink slowly if the compressor motor is stopped while in Automatic mode as a warning that the machine may restart at any time. The display screen will periodically indicate “the compressor is standing by.” The Automatic Mode LED will blink rapidly if machine restart is imminent. The display screen will periodically display a message to indicate the state of the machine prior to restart (e.g., Waiting for Blowdown). Maintenance/Warning Indicator (AMBER LED) - Lights when recommended maintenance or service warning is issued. In most cases the machine will continue to operate normally. The display screen will periodically display the recommended maintenance actions or the cause of the warning. Refer to Section 5, Troubleshooting to resolve maintenance conditions.
13
Section 4 WS CONTROLLER DESCRIPTION (RED LED) - Lights when a compressor fault has Fault Warning Indicator occurred. The indicator will remain lit and the compressor will remain inoperative until the fault condition is remedied. The controller display screen will indicate FAULTED and periodically a brief description of the cause of the fault. Refer to Section 5, Troubleshooting to resolve fault conditions.
4.4
DISPLAY SCREEN Information relevant to the compressor operation is presented in three views on the controller display screen: Normal View, Compressor Status Views, Compressor Adjustment Views.
4.4.1
NORMAL VIEW The Normal View is the default view for the display screen. When in Normal View, information regarding the compressor current operating conditions appears on the display screen. See Figure 4.1. The top line of the display screen in Normal View shows the discharge pressure and the internal temperature of the compressor package. The lower line of the Display Screen displays the current compressor operating mode.
Figure 4.1 Display Screen Normal View Example
118 psi 70°F AU TO M A TIC
Under normal operating conditions, the lower line of the Controller Display Screen will alternately display the compressor operating state, warning messages, service reminders, and fault conditions when they occur. 4.4.2
COMPRESSOR STATUS VIEW The Compressor Status View shows real-time machine measurement information. navigational arrow. The top line This information is quickly accessed using the Down of the display screen will indicate “Compressor Status:”. See Figure 4.2. The second line will show the name of the measurement (e.g., Line Pressure). The bottom line will display the current value of the measurement being viewed.
Figure 4.2 Display Screen Compressor Status View Example
Compressor Status: Line Pressure
118
14
psi
Section 4 WS CONTROLLER DESCRIPTION Listed below are compressor attributes that may be viewed in the Compressor Status View. This list will vary based on specific machine configurations. Temperature 1 - Displays the current compressor temperature at temperature probe 1. Temperature 2 - Displays the current compressor temperature at temperature probe 2. Temperature 3 - Displays the current compressor temperature at temperature probe 3. Sump Pressure - Displays the current sump pressure (P1). Line Pressure - Displays the current line output pressure (P2). Pressure 3 - Displays the pressure (P3) at the specified transducer location. Separator Pressure Δ - Displays the current separator pressure differential. Run Hours - Displays the total time the compressor has been running loaded or unloaded. 4.4.3
COMPRESSOR ADJUSTMENT VIEW – CONTROL PARAMETERS The Compressor Adjustment View shows current machine parameters which are conditions and limits that can be modified by the operator. This view is accessed using the navigational arrows and is indicated by the text “Show Setting -------” appearing on the first line of the display screen. See Figure 4.3A. Pressing Enter at the Show Setting screen accesses the Change Mode. This mode is indicated by the text “Change ------“ appearing as reverse characters on the first line of the display screen and the change parameter appearing on the second line. See Figure 4.3B. The value of the parameter is displayed as reverse characters on the bottom line. Refer to Section 3, ADJUSTMENTS, for instructions on changing the compressor control parameters and a list of the control parameters that can be modified by the user.
Figure 4.3A Adjustment View – Show Setting Example
Show Setting - - - - - - Unload Pressure
110 psi
Adjustment View
Figure 4.3B Adjustment View – Change Setting Example
Change Setting - - - - - - Unload Pressure
110 psi 4.5
Change View
OPERATING MODES The Operating Mode is the manner in which the machine operation is being controlled. There are five Operating Modes: AUTOMATIC, MANUAL, OFF, FAULT, and UI COMM.
15
Section 4 WS CONTROLLER DESCRIPTION The active operating mode of the compressor appears on the lower line of the display screen’s Normal View. See Figure 4.4.
Figure 4.4 Compressor Operating Mode Display
118 psi 70°F AU TO M A TIC
Automatic Mode (Normal View)
The compressor operating modes are described below: Automatic mode - Indicated by the word AUTOMATIC appearing in the lower line of the display window. This is a user selected mode that sets the compressor motor to automatically start when conditions necessitate and stop when motor operation not required. Manual Mode - Indicated by the word MANUAL appearing in the lower line of the display window. This is a user selected mode that allows the operator to manually control the compressor motor operation. When the START
pad is pressed while
in Manual Mode the compressor motor will run continuously until the STOP pad is pressed. The compressor pump and all other machine parameters function the same in both Manual and Automatic modes. Off mode - Indicated by the word OFF appearing in the lower line of the display window. This mode indicates that the compressor and motor have been turned off under normal conditions. When in this mode the machine will not operate until the START
pad is pressed.
Fault mode - Indicated by the word FAULTED appearing in the lower line of the display window. This mode indicates that a machine problem has occurred causing the controller to shut down the machine until the condition is cleared. After a fault condition has been resolved, the fault indication can be cleared from the controller by pressing pad. Refer to Section 5, Troubleshooting, for information on resolving the STOP fault conditions. UI Comm mode - Indicated by the word UI COMM appearing in the lower line of the display window. This mode indicates that the User Interface has lost communication and, as a result, the machine operating mode or status is unknown.
4.6
OPERATING STATES Operating States describe the state of the compressor operation in response to the current mode and current conditions. Essentially, the operating state is what the machine is doing at a particular moment. Most operating states occur automatically as normal functions of the compressor and require no direct action from the operator.
NOTE Machine operating states may vary depending on compressor model.
16
Section 4 WS CONTROLLER DESCRIPTION Text descriptions of operating states appear periodically on the lower line of the display screen while in Normal View. See Figure 4.5. The leading line will read “The Compressor is” below which the operating state description will be displayed. Figure 4.5 Controller Display Normal View: Operating State
118 psi 70°F
The compressor is Standing by
Operating State
The list below provides an explanation of each Operating State message that may appear in the Normal View display. Some operating states occur instantaneously and may not be seen by the operator. Initializing - Displayed as the compressor is powered up. Stopping - May be briefly displayed as the compressor is being stopped via the Controller Panel. Manually Stopped - Displayed when the compressor operation is stopped. Remote Stopping - May be briefly displayed as the compressor is being stopped remotely. Remote Stopped - Displayed when the compressor operation is stopped but is armed to restart. The machine will start when the remote start contact is close. NOTE: The machine may start at any time when conditions are met. Standing by - Displayed when the compressor is stopped and waiting for proper conditions before restarting. Faulting - Displayed as a fault condition is occurring. Faulted - Displayed after a fault condition has occurred. Waiting for Blowdown - Displayed when the compressor is waiting for the sump to reach a set minimum pressure prior to starting. After the pressure has reduced to the set level, the compressor will start automatically. Starting 1 - Displayed as compressor initiates stage 1 startup processes. Starting 2 - Displayed as compressor initiates stage 2 startup processes. Starting 3 - Displayed as compressor initiates stage 3 startup processes. Loading - Displayed as the compressor begins delivering air. Loaded and Modulating - Displayed when the compressor is delivering air. Fully Loaded - Displayed when the compressor is delivering air at full rated capacity. Unloading - Displayed as the compressor is being unloaded automatically. Remote Unloading - Displayed as the compressor is being unloaded remotely. Running Unloaded - Displayed when the system is running with the compressor unloaded.
17
Section 4 WS CONTROLLER DESCRIPTION Remote Unloaded - Displayed when the compressor has been unloaded remotely.
4.7
NORMAL VIEW SERVICE REMINDERS Service reminders may alternately appear in the Normal View display. See Figure 4.6. The Service Reminder screen is indicated by the words “Recommended Service:” appearing on the second line of the display. The bottom line displays a brief description of the recommended service required. When a service reminder appears, the machine will continue to operate normally, however, the appropriate service should be scheduled and accomplished within a short period of time. Figure 4.6 Controller Display Normal View: Service Reminder
118 psi 70°F
Recommended Service : Change Fluid Filter
Service Reminder
The list below provides an explanation of the Service Reminders that may appear in the Normal View display. Refer to Section 5, Troubleshooting, for additional instructions on actions to be taken when a service reminder appears. Change Fluid Filter - The compressor fluid filter should be changed within the time frame noted in the machine operation specifications. Change Separator - The compressor fluid separator should be changed within the time frame noted in the machine operation specifications. Change Air Filter - The compressor air filter should be changed within the time frame noted in the machine operation specifications. Analyze Fluid - A fluid analysis should be scheduled per machine operation specifications. Change Fluid - The compressor fluid should be changed within the time frame noted in the machine operation specifications. Maintenance - Periodic maintenance should be scheduled per machine operation specifications.
4.8
WARNING MESSAGES When a Warning condition occurs a warning message will alternately appear on the lower line of the Normal View display. See Figure 4.7. Under a Warning condition, the machine will continue to operate normally, however, appropriate maintenance action must be taken to remedy the warning condition. Refer to Section 5, Troubleshooting, for additional instructions on actions to be taken when warning conditions exists.
18
Section 4 WS CONTROLLER DESCRIPTION Figure 4.7 Controller Display Normal View: Warning Message
118 psi 70°F
Warning: Sequence Comm Error
Warning Message
The list below provides an explanation of the Warning Messages that may appear in the display when an error occurs. Dryer Warning - Indicates a dryer malfunction is occurring. Consult the dryer manual and/or dryer manufacturer. High Fluid Filter dP - Indicates the fluid filter pressure differential is high. The fluid filter needs to be checked or changed. High Separator dP - Indicates the fluid separator pressure differential is high. The separator unit needs to be checked or changed. High Air Filter dP - Indicates the air filter pressure differential is high. The air filter unit needs to be checked or changed. High Temperature 1 - Indicates that the compressor Temperature at temp probe location 1 is approaching the set high limit. High Temperature 2 - Indicates that the compressor Temperature at temp probe location 2 is approaching the set high limit. High Temperature 3 - Indicates that the compressor Temperature at temp probe location 3 is approaching the set high limit. Low Battery - Indicates the I/O backup battery is low. Low Temperature 1 - Indicates that the compressor Temperature at temp probe location 1 is approaching the set low limit. Low Temperature 2- Indicates that the compressor Temperature at temp probe location 2 is approaching the set low limit. Low Temperature 3 - Indicates that the compressor Temperature at temp probe location 3 is approaching the set low limit. Sequence Comm Error - Indicates a communication problem exists between the compressor controllers set up for sequential operation. User Option Warning – Indicates a user furnished switch has been activated. Power Interruption - Indicates that a power interruption has occurred.
The compressor may restart automatically after power has been restored following a power failure.
19
Section 4 WS CONTROLLER DESCRIPTION 4.9
FAULT MESSAGES When a Fault condition occurs, the machine will shut down and the display will indicate FAULTED on the lower line of the display window. A Fault Message will alternately appear in the lower line of the Normal View display briefly describing the nature of the fault. See Figure 4.8.
Figure 4.8 Controller Display Normal View: Fault Message
118 psi
70°F
The fault cause is: E-Stop Push Button
Fault Message
The list below provides an explanation of the Fault Messages that may appear when problems occur. Refer to Section 5, Troubleshooting, for instructions on actions to be taken when a fault condition occurs. Aux Motor Overload - The auxiliary motor overload relay has been tripped due to a power overload in the auxiliary motor. Controller Watchdog - Controller watchdog timer error. Dryer Fault - Indicates a dryer malfunction has occurred. Consult the dryer manual and/or dryer manufacturer. Dryer overload - Indicates a dryer overload has occurred. Consult the dryer manual and/or dryer manufacturer. E-Stop Push Button - Emergency Stop button has been pressed. High AN0 Sensor (AN0 - AN9) - Device assigned to sensor input AN0 through AN9 (temp probe, transducer unit, etc.) or wiring between the device and the controller module has resulted in an open circuit. High Package Pressure - Package Discharge pressure has exceeded the set high limit. High Plant Pressure - Plant line pressure has exceeded the set high limit. High Pressure A … B - Pressure at specified transducer (A or B) has exceeded the set high limit. High Sump Pressure - Compressor sump pressure has risen above the set limits. High Temperature 1 … 3 - The temperature at specified temp probe (1 through 3) has risen above the set high limit. High Volt Sensor - Indicates the system high voltage sensor has failed. Illegal State - Controller operating error. Internal Com Error - An error in communication between the controller and the compressor has occurred. Low AN0 Sensor (AN0 - AN9) - Device assigned to sensor input AN0 through AN9 (temp probe, transducer unit, etc.) or wiring between the device and the controller module has resulted in a short circuit. Low Line Pressure - The line pressure has fallen below the set low limit. Low Fluid Pressure - Compressor fluid pressure has fallen below the set low limit. Low Sump Pressure - Compressor sump pressure has fallen below the set limits.
20
Section 4 WS CONTROLLER DESCRIPTION Low Temperature 1 … 3 - Temperature at the specified temp probe (1 through 3) has fallen below the set low limit. Low Voltage Sensor - Indicates the system low voltage sensor has failed. Low Water Pressure - The water pressure switch has been tripped due to low water pressure. Low Water Pressure Switch - The water pressure switch is faulty. Main Motor Overload - The main motor overload relay has been tripped due to a power overload in the main motor. Memory Fault - The controller I/O board has failed. Option Input - User option error. Option Input Run - User option error. Phase Relay (User option)- Indicates external phase protection relay has tripped. Power Interruption - A power interruption has occurred at the controller. Separator dP High - Separator pressure differential has exceeded the set high limit. Starter Aux. Contact - Starter auxiliary contact failed to connect power to the starter. UI Voltage Too High - The voltage to the User Interface has risen above the set limit. UI Voltage Too Low - The voltage to the User Interface has fallen below the set limit. VSD1 … VSD2 Comm Fault - An error in communication between the controller and the specified VSD compressor has occurred.
21
Section 4 WS CONTROLLER DESCRIPTION NOTES
22
Section 5 TROUBLESHOOTING 5.
5.1
TROUBLESHOOTING
TROUBLESHOOTING INTRODUCTION This Troubleshooting section is provided as a guide to aid in diagnosing and resolving compressor problems when they occur. The information contained in Table 5.1, Troubleshooting Guide, has been compiled from factory experience and contains symptoms and usual causes for the described problems. Each Service Reminder, Warning, or Fault Message is listed with conditions of when the problem may occur, a probable cause, and a suggested solution to the problem. DO NOT assume that these are the only problems that may occur. This document cannot address every possible adverse condition that may occur nor does it provide every solution for the potential troubles listed. All available data concerning the trouble should be systematically analyzed before undertaking any repairs or component replacement procedures. Always perform a detailed visual inspection when a machine problem occurs prior to attempting any repairs. Doing so may avoid unnecessary repair and/or additional damage to the compressor. Always remember to: a.
Check for loose wiring.
b.
Check for damaged piping.
c.
Check for parts damaged by heat or an electrical short circuit, usually apparent by discoloration or a burnt odor.
Should your problem persist after making the recommended check, consult your nearest Sullair Distributor or the Sullair Corporation factory Service Department.
NOTE Sections 5.2 and 5.3 portray common systematic problems that can occur during controller operation. For a more thoroughly in-depth coverage of machine operation troubles, consult the Troubleshooting Section in the machine’s operator’s manual.
23
Section 5 TROUBLESHOOTING 5.2
TROUBLESHOOTING GUIDE Table 5.1 contains symptoms and usual causes for the problems that may occur throughout the compressor system. Each warning or fault message that may appear is listed along with conditions for the problem, a probable cause, and a suggested solution to the problem. DO NOT assume that these are the only troubles that may occur.
TABLE 5.1 WS Controller Troubleshooting Guide
MESSAGE Analyze Fluid
PROBABLE CAUSE
REMEDY
Service interval has expired.
Select Maintenance from menu to see service due and part numbers.
Maintenance due. Aux. Motor Overload
Auxiliary Motor Tripped on Cooling Fan, Fluid Pump or Other Motor.
Reset auxiliary overload after element cools. Verify correct motor amps. Check for loose connections. Check motor starter contact for proper operation. Check line voltage, if low consult power company.
Change Air Filter
Service interval has expired.
Change Fluid
Maintenance due.
Perform recommended maintenance and reset the reminder using WSPC.
Change Fluid Filter Change Separator Controller Watchdog
Controller fault.
Contact Sullair Factory Service.
Dryer Fault
Indicates a general dryer malfunction has occurred.
Consult the dryer manual and/or dryer manufacturer.
Dryer Overload
Indicates a dryer overload has occurred.
Consult the dryer manual and/or dryer manufacturer.
Dryer Warning
Dryer malfunction is imminent.
Consult the dryer manual and/or dryer manufacturer.
E-Stop Push Button
E-Stop Button Active.
Release button.
Faulty E-Stop Button.
Check wiring.
Differential Pressure Across Inlet Filter High.
Replace filter.
High analog input AN0 through AN9
Sensor (Pressure Transducer, Temp Probe, etc.) or Wiring Failure.
Check sensor wiring.
High Fluid Filter ΔP
Pressure across fluid filter above 20 psi (1.4 bar) while running.
Replace fluid filter.
High Air Filter ΔP
Fluid filter clogged.
Check inlet filter pressure switch. Check sensor.
Low ambient temperature.
Sump heater may be required in ambients below 40°F (4°C).
Sensor failure.
Check sensor, wiring and tubing.
High Package Pressure
High pressure.
Check operation of valves and controls.
High Pressure A
Faulty pressure sensor.
Check and replace pressure sensor if defective.
High Pressure B
Continued
24
Section 5 TROUBLESHOOTING TABLE 5.1 WS Controller Troubleshooting Guide (Continued) MESSAGE
PROBABLE CAUSE
REMEDY
High Sump Pressure
Sump Pressure High (Poppet, Sullicon, Spiral, Blowdown or Pneumatic Valve Failed).
Check valves. Check Sullicon adjustment (see Control Adjustment section in the compressor operator’s manual).
Faulty solenoid valves.
Check solenoid valve operation and wiring.
Faulty pressure regulator.
Check pressure regulator adjustment and operation. Check minimum pressure check valve (not applicable to Fluid Free compressors).
High Temp Fault.
Ambient above 105°F (41°C), improve local ventilation.
Fluid level low.
Replenish fluid to proper level.
Thermal valve fault.
Check thermal valve operation.
Cooler fins dirty.
Clean Cooler fins and fan blades.
Low water flow.
Check for valve closed, pump off or broken pipe.
High water temperature.
Increase water flow or lower water temperature.
Cooler plugged.
Clean cooler tubes and shell. If plugging persists, use cleaner water.
Temp probe or sensor failure.
Check sensor and wiring.
Illegal State
Controller fault.
Contact Sullair Factory Service.
Internal Com Error
Module Network Error; Communication has failed between the Display Module, I/O Module and other modules.
Check wiring.
Low analog input AN0 through AN9
Sensor (Pressure Transducer, Temp Probe, etc.) or Wiring Failure.
Check sensor wiring.
Low Battery Warning
Controller I/O backup battery is low. Demand exceeds capacity.
Replace battery.
High Temperature 1 High Temperature 2 High Temperature 3
Low Line Pressure
Leaks in supply lines. Low Fluid Pressure
Reduce demands. Increase capacity. Check for leaks or open lines in air supply. Repair as necessary.
Fluid filter clogged.
Replace fluid filter.
Sump fluid level low.
Replenish fluid to proper level.
Low ambient temperature.
Sump heater may be required in ambients below 40°F (4°C).
Fluid pump failure. Low Sump Pressure
Check sensor.
Fluid pump may be required for remote coolers. Consult Sullair service department.
Bad sensor or connections.
Check pressure sensor, wiring and tubing.
Machine may have failed to start.
Check machine operation.
Continued
25
Section 5 TROUBLESHOOTING TABLE 5.1 WS Controller Troubleshooting Guide (Continued)
MESSAGE
PROBABLE CAUSE
REMEDY
Low Temperature 1
Low ambient air temperature
Sump heater may be required in ambients below 40°F (4°C).
Low Water Pressure
Cooling Water Pressure below 10 psi (0.7 bar).
Check for closed valves or broken pipes.
Low Water Pressure Switch
Switch is shorted or open.
Replace switch. Check wiring for shorts, arcing or loose connections.
Main Motor Overload
Main Motor Overload Relay Tripped.
Reset overload after heater element cools down.
Low Temperature 2 Low Temperature 3
Check that compressor is properly configured. Ensure load pressure is set below limit of compressor. Check line voltage, if low consult power company. Maintenance due.
Perform recommended maintenance and reset the reminder using WSPC.
Memory Fault
The controller I/O board has failed.
Board replacement required. Contact Sullair Service.
Option Input
User furnished switch has operated.
Check operation of optional device.
Phase Relay
User furnished external phase relay protection relay has tripped.
Check operation of optional device. Refer to user supplied phase relay documentation and troubleshooting steps.
Power Interruption
Intermittent Control Power.
Check line voltage and connections.
Separator dP High (fault)
Pressure Differential Across Separator High.
Replace separator.
High Separator dP (warning)
Plugged separator elements.
Check sensor wiring.
Sequence Comm Error
Cable or connection fault between compressors.
Check wiring.
Improper sequence adjustments.
Check sequence settings of all compressors in the sequence.
Maintenance
Option Input Run
Starter Aux. Contact
Service interval has expired.
Pressure sensor failure.
Starter failed to operate.
Check starter and control wiring.
Faulty auxiliary contact.
Check contact and contact wiring.
UI Voltage too High
Controller fault.
Contact Sullair Factory Service.
UI Voltage too Low
Controller fault.
Contact Sullair Factory Service.
User Option Switch
User furnished switch has operated.
Check function of optional device.
Voltage Sensor failed High
Controller fault.
Contact Sullair Factory Service.
Voltage Sensor failed Low
Controller fault.
Contact Sullair Factory Service.
26
Section 5 TROUBLESHOOTING 5.3
MACHINE BEHAVIOR AFTER A POWER INTERRUPTION If the compressor was faulted prior to the power interruption, the controller will resume the FAULTED condition and display the reason for the fault. Repair the cause of the fault and press the STOP
pad to reset the controller.
If the compressor was manually stopped prior to the power interruption, the controller will return to the manually stopped mode. Press the start button to manually restart operation. If the restart timer is greater than zero AND the controller was in Automatic or Manual mode prior to the interruption, the controller will resume that mode after the restart timer expires. No key press is necessary to restart the compressor.
5.4
INTERNAL BATTERY The WS Controller employs an internal battery that maintains the real-time clock and maintains the integrity of the controller memory records when power is disconnected from the controller. For best performance, ensure that the battery is functioning. If the controller is operated with a drained or dead battery, the time-of-day records will not work properly and loss of recent records could occur. If recent records are lost due to an inoperative battery (or other reason), the controller will revert to the last saved versions of settings and records. The internal battery is located inside the controller I/O module and will operate for several years without requiring maintenance. When the battery voltage gets low, the controller will issue a “Change Battery” warning. Perform the following steps to replace the battery. 1.
Press the STOP
2.
Disconnect and lockout power according to lockout/tagout procedure.
3.
Open the controller enclosure and locate the I/O Control Module.
4.
Remove six screws from I/O Control Module cover and remove cover.
5.
Locate the internal battery. The battery is located near one end of the I/O circuit board (usually oriented towards the top).
6.
Remove the battery and replace with a battery type BR2330.
7.
Replace the cover, close the enclosure, follow normal startup procedures.
pad to stop the compressor.
Internal Battery Type BR2330 Remove
Remove
I/O Control Module
I/O Control Module Circuit Board
27
Section 5 TROUBLESHOOTING NOTES
28
Section 6 VARIABLE SPEED DRIVE 6.
6.1
VARIABLE SPEED DRIVE
SAFETY The following special instructions apply to VSD packages provided with electronic adjustable speed motor drives. These alerts are in addition to other warnings and cautions that apply to VSD operation.
Ground the unit following the instructions in this manual. Ungrounded units may cause electric shock and/or fire. The variable speed drive has a large capacitive leakage current during operation, which can cause enclosure parts to be above ground potential. Proper grounding, as described in this manual, is required. Failure to observe this precaution could result in death or severe injury.
Before applying power to the variable speed drive, make sure that the front and cable covers are closed and fastened to prevent exposure to potential electrical fault conditions. Failure to observe this precaution could result in death or severe injury.
Refer all drive service to trained technicians. This equipment should be installed, adjusted, and serviced by qualified electrical maintenance personnel familiar with the construction and operation of this type of equipment and the hazards involved and in accordance with published service manuals. Failure to observe this precaution could result in death or severe injury.
Line terminals (L1, L2, L3), motor terminals (U, V, W) and the DClink/brake resistor terminals (-/+) are live when the drive is connected to power, even if the motor is not running. Contact with this voltage is extremely dangerous and may cause death or severe injury.
Before opening the variable speed drive covers: • Disconnect all power to the variable speed drive. • Wait a minimum of 5 (five) minutes after all the lights on the keypad are off. This allows time for the DC bus capacitors to discharge. • A hazard voltage may still remain in the DC bus capacitors even if the power has been turned off. Confirm that the capacitors have fully discharged by measuring their voltage using a multimeter set to measure DC voltage. Failure to follow the above precautions may cause death or severe injury. 29
Section 6 VARIABLE SPEED DRIVE CAUTION Do not perform any meggar or voltage withstand tests on any part of the variable speed drive or its components. Improper testing may result in damage. Prior to any tests or measurements of the motor or the motor cable, disconnect the motor cable at the variable speed drive output terminals (U, V, W) to avoid damaging the variable speed drive during motor or cable testing.
CAUTION Do not touch any components on the circuit boards. Static voltage discharge may damage the components.
CAUTION Install the variable speed drive in a well-ventilated room that is not subject to temperature extremes, high humidity, or condensation, and avoid locations that are directly exposed to sunlight, or have high concentrations of dust, corrosive gas, explosive gas, inflammable gas, grinding fluid mist, etc. Improper installation may result in a fire hazard.
CAUTION Make sure that no power correction capacitors are connected to the variable speed drive output or the motor terminals to prevent variable speed drive malfunction and potential damage.
CAUTION Make sure that the variable speed drive output terminals (U, V, W) are not connected to the utility line power as severe damage to the variable speed drive may occur.
6.2
OVERVIEW The Sullair VSD drive application is custom designed for operation of air compressors. All necessary control functions are performed through the WS Controller keypad and WSPC software. The drive functions as a module on the WS Controller communications bus. WSPC provides detailed information about relevant drive status data and compressor performance. Drive controls are coordinated with internal compressor controls, and with other Supervisor or WS controlled compressors in sequenced systems. The WS Controller monitors drive performance to provide motor thermal and other protections in an easy-to-use, robust design.
30
Section 6 VARIABLE SPEED DRIVE Table 6-1: Cable and Fuse Sizes - 460V Ratings _ UL recognized type RK _ Based on a maximum environment of 104°F (40°C)
hp 15
Size (A) 23
Fuse (A) 30
Wire Size Power 8
Wire Size Ground 8
20
31
35
8
8
25
38
50
6
8
30
46
60
4
6
40
61
80
2
6
50
72
100
2
6
60
87
110
1/0
6
75
105
125
2/0
2
100
140
175
4/0
1/0
125
170
200
300MCM
2/0
150
205
250
350MCM
3/0
200
261
350
2 x 250MCM
3/0
250
300
400
2 x 250MCM
300MCM
300
385
450
2 x 300MCM
300MCM
350
460
600
2 x 400MCM
300MCM
Table 6-2: Cable and Fuse Sizes - 575V Ratings _ UL recognized type RK _ Based on a maximum environment of 104°F (40°C)
hp 15
Size (A) 18
Fuse (A) 30
Wire Size Power 8
Wire Size Ground 8
20
22
35
8
8
25
27
40
6
8
30
34
50
4
6
40
41
60
2
6
50
52
80
2
6
60
62
100
1/0
6
75
80
125
2/0
2
100
100
175
4/0
1/0
125
125
200
300MCM
2/0
150
144
250
350MCM
3/0
200
208
350
2 x 250MCM
3/0
250
361
450
2 x 250MCM
300MCM
300
325
500
2 x 300MCM
300MCM
31
Section 6 VARIABLE SPEED DRIVE NOTE ELECTRICAL PREPARATION Interior electrical wiring is performed at the factory. Required customer wiring is minimal, but should be done by a qualified electrician in compliance with OSHA, National Electrical Code, and/or any other applicable State, Federal, and local electrical codes concerning isolation switches, fused disconnects, etc. Sullair provides a wiring diagram for use by the installer.
NOTE Customer must provide electrical supply power disconnect within sight of machine.
6.3
INSTALLATION The variable speed AC drive has been properly mounted, adjusted, and tested prior to shipment of the compressor package. Inspect the unit to ensure it was not damaged during shipment. The package provides a terminal block for connection of three-phase power and ground. Refer to the package wiring diagram for specific connection information. All internal wiring to the drive and motors has been provided by the factory, in accordance with the drive's requirements. Do not alter factory wiring. To ensure proper wiring to the package, use the following guidelines:
6.4
•
Use heat-resistant copper cables only, +75°C or higher.
•
The minimum input line cable and line fuses must be sized in accordance with the rated input current of the unit. See Table 6-1 and 6-2.
•
Consistent with UL listing requirements, for maximum protection of the variable speed drive, use UL recognized fuses, type RK, suitable for circuits delivering fault currents up to 100,000A.
WS CONTROLLER DISPLAY AND MENUS The flow diagram of Figure 6.1 shows the order in which the display messages appear on the WS Controller screen when connected to a VSD machine. As illustrated in the pad when viewing a parameter setting, enables diagram, a press of the ENTER access to change the control parameter value. Refer to Section 4 for a general description of the WS Controller displays. This section addresses special functions applicable to VSD packages.
32
Section 6 VARIABLE SPEED DRIVE Figure 6.1 Controller Display Flow Diagram – VSD Compressor
NORMAL VIEW Compressor Status: Temperature 1 Compressor Status: Sump Pressure Compressor Status: Line Pressure Compressor Status: Separator Pressure Δ Compressor Status: Run Hours Compressor Status: VSD Temperature Compressor Status: VSD Capacity Show Setting Unload Pressure
(ENTER)
Change Setting Unload Pressure
Show Setting Load Delta Pressure
Change Setting Load Delta Pressure
Show Setting VSD Setpoint
Change Setting VSD Setpoint
Show Setting Unload Minutes
Change Setting Unload Minutes
Show Setting Drain Interval Mins.
Change Setting Drain Interval Mins.
Show Setting Drain Time Seconds
Change Setting Drain Time Seconds
Show Setting Wye Delta Seconds
Change Setting Wye Delta Seconds
Show Setting Modulate
Change Setting Modulate
Show Setting Operating Mode
Change Setting Operating Mode
Show Setting Language
Change Setting Language
33
Section 6 VARIABLE SPEED DRIVE 6.4.1
VSD STATUS In addition to the general status messages displayed on the WS Controller, two status messages will display to indicate, a) the temperature variable speed drive, and b) the delivery capacity of the variable speed package. The display indications are shown as: VSD Temperature - High temperatures usually indicate a need for cleaning of the VSD fan or heat sink by a trained service technician. VSD Capacity % - This is displayed as an approximate percentage of the maximum capacity for the package.
6.4.2
VSD CONTROL PARAMETERS In addition to the general control parameters described in Section 4, a VSD specific parameter can be adjusted at the WS Controller keypad to control VSD operation. The VSD control parameter is shown as: VSD Setpoint Pressure – This is the targeted pressure (psi, bar, or kpa) for the variable speed controls. The setpoint pressure is normally adjusted near the bottom of the load/unload delta. The compressor speed will be adjusted to maintain this pressure. Most packages will allow adjustment of this parameter over a wide range, to allow tailoring to the needs of the application. Adjustments will be automatically made as the maximum speed to operate the motor at its full capacity at any pressure.
6.4.3
WSPC Interface Application - VSD The WSPC Interface is a PC application that allows the user to monitor, control, and modify the compressor operation. It provides functionality not available via the WS Controller panel. Refer to the WSPC User Interface manual for details on controlling and modifying the VSD package performance using the WSPC application.
6.5
STARTUP OF NEW VSD COMPRESSOR PACKAGE Read and follow all safety warnings and cautions in this manual. 1. At installation ensure: •
That the incoming power and ground wires are properly connected to terminal blocks in the electrical control box.
•
Visually check all power and controls connections to the drive to ensure that no damage has occurred.
2. Check that moisture has not condensed inside the variable speed drive. 3. Connect to the utility and switch the power on. The WS Controller will establish communications and report errors if correct conditions are not found. If replacing a drive, communication faults will be indicated for either improper communication wiring or improper application or communication software in the drive. 4. Check the direction of the fan rotation. To observe the rotation, quickly press START then the STOP on the WS Controller. If the fan rotates incorrectly, disconnect power and interchange two of the fan motor leads at the fan starter. Compressor motor rotation is factory set.
6.6
VSD COMPRESSOR TROUBLESHOOTING The WS Controller continuously monitors VSD drive performance through the serial channel. Table 6-3 shows Fault messages that are displayed by the WS Controller in the event of problems along with possible causes and some likely solutions. The controller
34
Section 6 VARIABLE SPEED DRIVE monitors communications with the inverter and will display a fault message if these communications are broken. The WS Controller will display a VSD drive fault with a code number of the form V—accompanied by a text description. If a keypad service tool is plugged into the drive, it will display the fault code and the fault name.
Table 6-3 VSD Troubleshooting Guide – Drive Faults CODE FAULT
POSSIBLE CAUSE
SOLUTION
VSD1
Com Fault
Communications lost with the VSD
Check connections to the VSD. Check VSD control power and check for board faults.
V01
Overcurrent
The variable speed drive has detected a high current (>4xIn) in its output due to:
Check loading.
•
sudden heavy load increase
Check cables.
•
short in the motor
•
short in the cables to the motor
•
unsuitable motor
V02
V03
Overvoltage
Ground Fault (Earth Fault)
The DC-link voltage has exceeded its high limit due to: •
deceleration time too short
•
high voltage levels or surges in the utility supply
Current sensing indicates that the sum of motor phase currents is not zero. •
V05
V06
Charging Switch
Emergency Stop
Check motor.
Make the deceleration time longer. Use a chopper and brake resistor. Correct utility supply voltage (level is too high). Add input impedance to limit surges. Remove faults from ungrounded systems. Check the motor and motor cables.
insulation failure in motor or motor cables
The charging switch was open when the START command was given due to: •
faulty operation
•
component failure
An Emergency stop signal was received from one of the digital inputs
Reset the fault and restart. Should the fault re-occur, contact Sullair service.
Determine the reason for the Emergency stop and remedy it.
Continued
35
Section 6 VARIABLE SPEED DRIVE Table 6-3 VSD Troubleshooting Guide – Drive Faults (Continued) CODE FAULT V07
Saturation Trip
POSSIBLE CAUSE •
defective component
•
motor or motor cable short
SOLUTION Cannot be reset from the keypad. Switch off power. If this fault appears simultaneously with Fault 1, check the motor and motor cables. If the problem is not in the motor or its cables, do not re-connect power! Contact Sullair service.
V08
System Fault
•
component failure
•
faulty operation
Reset the fault and restart. Should the fault reoccur, contact Sullair service.
Note: Exceptional fault data record, see the Active Fault Menu and Fault Time Data Record for more information V09
Undervoltage
DC-link voltage is less than the minimum safe operating voltage limit.
If there was a supply voltage loss or dip, reset the fault and restart the variable speed drive.
•
most probable cause: supply voltage too low
•
variable speed drive internal fault
Check the supply voltage. If it was within specification at the time of the fault, an internal failure has occurred. Contact Sullair service.
V10
Input Line Supv
Input line phase is low or missing.
Check the utility supply voltage, cables and connections.
V11
Output Phase Sv
Current sensing indicates that there is no current in one motor phase.
Check the motor cables, connections and motor.
V12
Brake Chopper Sv
This fault is disabled. A display of this message indicates that the components or settings of the variable frequency drive have been changed.
Correct drive parameters need to be downloaded. Contact Sullair service.
V13
VFD Undertemp
Heatsink temperature is under 14°F(-10°C)
Provide supplemental heating or relocate the variable speed drive to a warmer location.
Continued
36
Section 6 VARIABLE SPEED DRIVE Table 6-3 VSD Troubleshooting Guide – Drive Faults (Continued) CODE FAULT V14
VFD Overtemp
POSSIBLE CAUSE Heatsink temperature is over 194°F(90°C).
SOLUTION An over-temperature warning is issued when the heat sink temperature exceeds 185°F (85°C), a fault occurs at 194°F (90°C). Check for the correct volume and unrestricted flow of cooling air. Check the heatsink for dust or dirt buildup. Check the highest ambient temperature level. Make sure that the switching frequency is not set too high in relation to ambient temperature and motor load.
V15
V16
Motor Stalled
Motor Overtemp
•
motor or load mechanical failure
•
load is too high
•
stall parameter settings incorrect
•
motor is overloaded
•
motor overheating has been detected by the variable speed drive motor temperature model
Check motor, mechanical system and load level. Confirm the stall parameter settings.
Decrease the motor load. If no motor overload exists, check the temperature model parameters.
V17
Motor Underload
This fault is disabled. A display of this message indicates that the components or settings of the variable frequency drive have been changed.
Correct drive parameters need to be downloaded. Contact Sullair service.
V22
EEPROM Checksum
Parameter save fault
Upon reset of this fault, the variable speed drive will automatically reload the parameter default settings. Check all parameter settings after reset.
•
faulty operation
•
component failure
If the fault reoccurs, contact Sullair service. V24
Counter Fault
Values displayed on the counters are incorrect
Reset counters.
V25
µprocessor Watchdog
•
faulty operation
•
component failure
Reset the fault and restart. Should the fault reoccur, contact Sullair service.
Startup Prevented
Startup of the drive has been prevented.
V26
Check Start Enable/Interlock settings.
Continued
37
Section 6 VARIABLE SPEED DRIVE Table 6-3 VSD Troubleshooting Guide – Drive Faults (Continued) CODE FAULT
POSSIBLE CAUSE
SOLUTION
V29
Thermistor Fault
This fault is disabled. A display of this message indicates that the components or settings of the variable frequency drive have been changed.
Correct drive parameters need to be downloaded. Contact Sullair service.
V31
IGBT Temperature (hardware)
IGBT Inverter Bridge overtemperature protection has detected a high short-term overload current
Check loading.
V32
Fan Cooling
The variable speed drive cooling fan did not start when commanded
Contact Sullair service.
V34
CAN Bus Comm
This fault is disabled. A display of this message indicates that the components or settings of the variable frequency drive have been changed.
Correct drive parameters need to be downloaded. Contact Sullair service.
V36
Control Unit
The control unit cannot control the power unit and vice-versa
Change the control unit.
V37
Device Change (same type)
•
option board changed
Reset Controller.
•
different power rating of drive
Note: On reset, no Fault Time Data Record is made.
Check motor size.
Note: On reset, application parameter values are restored to default. V38
Device Added (same type)
•
option board added
Reset Controller.
•
drive of different power rating added
Note: On reset, no Fault Time Data Record is made. Note: On reset, application parameter values are restored to default.
V39
Device Removed
•
option board removed
Reset Controller.
•
drive removed
Note: On reset, no Fault Time Data Record is made. Note: On reset, application parameter values are restored to default.
V40
Device Unknown
Unknown option board or drive
Contact Sullair service.
V41
IGBT Temperature
IGBT Inverter Bridge overtemperature protection has detected a high short-term overload current
Check loading. Check motor size.
Continued
38
Section 6 VARIABLE SPEED DRIVE Table 6-3 VSD Troubleshooting Guide – Drive Faults (Continued) CODE FAULT
POSSIBLE CAUSE
SOLUTION
V42
Brake Overtemp
This fault is disabled. A display of this message indicates that the components or settings of the variable frequency drive have been changed.
Correct drive parameters need to be downloaded. Contact Sullair service.
V43
Encoder Fault
This fault is disabled. A display of this message indicates that the components or settings of the variable frequency drive have been changed.
Correct drive parameters need to be downloaded. Contact Sullair service.
V44
Device Change (different type)
•
option board changed
Reset Controller.
•
different power rating of drive
Note: On reset, no Fault Time Data Record is made. Note: On reset, application parameter values are restored to default.
V45
Device Added (different type)
•
option board added
Reset Controller.
•
drive of different power rating added
Note: On reset, no Fault Time Data Record is made. Note: On reset, application parameter values are restored to default.
V50
Analog Input
Current at the analog input is< 4 mA
Adjust analog input parameter to "None".
V51
External fault
Digital input set as an external fault input has been triggered
Clear the package emergency stop. Check E-stop wiring to the drive input.
V52
Keypad Comm
The variable frequency drive parts or settings have been changed.
Drive parameters need to be downloaded. Contact Sullair service.
V53
FieldBus
The data connection between the communication bus master and the communication bus board has failed
Check WS Controller bus cable. If installation is correct contact Sullair service.
V54
Slot fault
Defective option board or slot
Check that the board is properly installed and seated in slot. If the installation is correct, contact Sullair service.
V56
PT100 Board
This fault is disabled. A display of this message indicates that the components or settings of the variable frequency drive have been changed.
Correct drive parameters need to be downloaded. Contact Sullair service.
39
WORLDWIDE SALES AND SERVICE
SULLAIR ASIA, LTD.
SULLAIR EUROPE, S.A.
Sullair Road, No. 1 Chiwan, Shekou Shenzhen, Guangdong PRV. PRC POST CODE 518068 Telephone: 755-6851686 Fax: 755-6853473 www.sullair-asia.com
Zone Des Granges BP 82 42602 Montbrison Cedex, France Telephone: 33-477968470 Fax: 33-477968499 www.sullaireurope.com
SULLAIR CORPORATION 3700 East Michigan Boulevard Michigan City, Indiana 46360 U.S.A.
www.sullair.com Telephone: 1-800-SULLAIR (U.S.A. Only) or 1-219-879-5451 Fax: (219) 874-1273
CUSTOMER CARE for Parts and Service 1-888-SULLAIR (785-5247) 219-874-1835
Specifications Subject To Change Without Prior Notice E06
Printed in the U.S.A.