Ignition Controller IC92x Manual Gb
Installation and Operation Manual IC-920/-922 Ignition Controller with ServLink J1939 CAN and Modbus® Version Manual 2
Views 183 Downloads 3 File size 2MB
Recommend stories


- Author / Uploaded
- Lokman Hossain
Citation preview
Installation and Operation Manual
IC-920/-922 Ignition Controller with ServLink J1939 CAN and Modbus® Version
Manual 26263 (Revision A)
WARNING—DANGER OF DEATH OR PERSONAL INJURY WARNING—FOLLOW INSTRUCTIONS Read this entire manual and all other publications pertaining to the work to be performed before installing, operating, or servicing this equipment. Practice all plant and safety instructions and precautions. Failure to follow instructions can cause personal injury and/or property damage.
WARNING—OUT-OF-DATE PUBLICATION This publication may have been revised or updated since this copy was produced. To verify that you have the latest revision, be sure to check the Woodward website: www.woodward.com/pubs/current.pdf The revision level is shown at the bottom of the front cover after the publication number. The latest version of most publications is available at: www.woodward.com/publications If your publication is not there, please contact your customer service representative to get the latest copy.
WARNING—OVERSPEED PROTECTION The engine, turbine, or other type of prime mover should be equipped with an overspeed shutdown device to protect against runaway or damage to the prime mover with possible personal injury, loss of life, or property damage. The overspeed shutdown device must be totally independent of the prime mover control system. An overtemperature or overpressure shutdown device may also be needed for safety, as appropriate.
WARNING—PROPER USE Any unauthorized modifications to or use of this equipment outside its specified mechanical, electrical, or other operating limits may cause personal injury and/or property damage, including damage to the equipment. Any such unauthorized modifications: (i) constitute "misuse" and/or "negligence" within the meaning of the product warranty thereby excluding warranty coverage for any resulting damage, and (ii) invalidate product certifications or listings.
CAUTION—POSSIBLE DAMAGE TO EQUIPMENT OR PROPERTY CAUTION—BATTERY CHARGING To prevent damage to a control system that uses an alternator or battery-charging device, make sure the charging device is turned off before disconnecting the battery from the system.
CAUTION—ELECTROSTATIC DISCHARGE Electronic controls contain static-sensitive parts. Observe the following precautions to prevent damage to these parts. • Discharge body static before handling the control (with power to the control turned off, contact a grounded surface and maintain contact while handling the control). • Avoid all plastic, vinyl, and Styrofoam (except antistatic versions) around printed circuit boards. • Do not touch the components or conductors on a printed circuit board with your hands or with conductive devices.
•
IMPORTANT DEFINITIONS A WARNING indicates a potentially hazardous situation which, if not avoided, could result in
•
A CAUTION indicates a potentially hazardous situation which, if not avoided, could result in
•
A NOTE provides other helpful information that does not fall under the warning or caution
death or serious injury. damage to equipment or property. categories.
Revisions—Text changes are indicated by a black line alongside the text.
Woodward Governor Company reserves the right to update any portion of this publication at any time. Information provided by Woodward Governor Company is believed to be correct and reliable. However, no responsibility is assumed by Woodward Governor Company unless otherwise expressly undertaken.
© Woodward 2004 All Rights Reserved
Manual 26263
IC-920/-922 Ignition Controller with ServLink
Contents ELECTROSTATIC DISCHARGE AWARENESS ................................................. IV CHAPTER 1. GENERAL INFORMATION ........................................................... 1 Introduction.............................................................................................................1 Theory of Operation................................................................................................1 Regulatory Compliance ..........................................................................................1
CHAPTER 2. TIMING SENSORS ................................................................... 12 Introduction...........................................................................................................12 Trigger Timing Sensor ..........................................................................................12 Reset Timing Sensor ............................................................................................12 Cam Timing Sensor..............................................................................................14
CHAPTER 3. TIMING CONTROLS ................................................................. 16 Introduction...........................................................................................................16 Manual Timing Adjustment...................................................................................16 4–20 mA or 0–5 V Input........................................................................................16 Speed Curve.........................................................................................................17 Timing Schedules A and B—Contact B Input ......................................................17 Timing Control Adjustments Diagram, Non J1939 ...............................................18 Timing Control Adjustments Diagram, J1939 enabled.........................................19 Individual Cylinder Timing Controls, with J1939 ..................................................19
CHAPTER 4. INPUT POWER AND IGNITION COIL PRIMARY OUTPUTS ............ 20 Input Power Requirements...................................................................................20 Input Power Fuse Requirements..........................................................................20 Input Power Wiring Requirements........................................................................20 High Voltage Power Supply..................................................................................21 Ignition Coil Primary Outputs................................................................................21 Odd Bank Connector ............................................................................................21 Even Bank Connector ..........................................................................................21 Ignition Coil Primary Output Wiring ......................................................................21
CHAPTER 5. ENERGY CONTROL ................................................................ 23 Introduction...........................................................................................................23 Manual Energy Control.........................................................................................23
CHAPTER 6. ENGINE CONTROLS AND SAFETY FEATURES ........................... 24 Introduction...........................................................................................................24 Overspeed Protection...........................................................................................24 Permissive Start Output........................................................................................24 Auxiliary Shutdown Input—Contact A ..................................................................25 Misfire Limit ..........................................................................................................25 Timing Sensor Fault Detection .............................................................................25 Speed Switch........................................................................................................25 Alarm Output ........................................................................................................26
CHAPTER 7. IC-900 SERIES SERVICE TOOL............................................... 27 Introduction...........................................................................................................27 Required Equipment.............................................................................................27 System Requirements ..........................................................................................27 Configuration Programming Procedure................................................................28 Establishing Communications ..............................................................................28 IC-900 Series Service Tool ..................................................................................29
Woodward
i
IC-920/-922 Ignition Controller with ServLink
Manual 26263
Contents CHAPTER 8. CONFIGURING THE IC-920/-922..............................................36 Introduction ...........................................................................................................36 Engine Configuration Page...................................................................................37 Timing Configuration Page ...................................................................................39 Speed Configuration Page ...................................................................................41 CAN Configuration Page for Controls without J1939 CAN ..................................43 CAN Configuration Page for Controls with J1939 CAN .......................................44 Modbus® Configuration Page for Controls with J1939 CAN ................................45 Working with Configuration Files..........................................................................45
CHAPTER 9. CANBUS INFORMATION FOR NON J1939 CONTROLS ..............51 CAN Bus Interface with the D-1 Display...............................................................51 D-1 Display ...........................................................................................................51 CANbus Cable......................................................................................................52
CHAPTER 10. CANBUS INFORMATION FOR J1939 CONTROLS ....................53 J1939 CAN Disabled ............................................................................................53 J1939 CAN Enabled .............................................................................................53 J1939 CAN Bus Status.........................................................................................54 SAE J1939 CAN Communications with Woodward EGS-02 ...............................55
CHAPTER 11. START-UP PROCEDURE ........................................................63 CHAPTER 12. TROUBLESHOOTING .............................................................65 Sensor Input Faults ..............................................................................................65 SCR Faults ...........................................................................................................65 Ignition Coil Faults ................................................................................................66 Self Test................................................................................................................66
CHAPTER 13. SERVICE OPTIONS ................................................................69 Product Service Options.......................................................................................69 Returning Equipment for Repair...........................................................................70 Replacement Parts ...............................................................................................71 How to Contact Woodward...................................................................................71 Engineering Services............................................................................................72 Technical Assistance............................................................................................73
APPENDIX A. REFERENCE INFORMATION ....................................................74 LED Operation ......................................................................................................74
APPENDIX B. DEFINITIONS AND PROGRAMMING PARAMETERS ....................76 APPENDIX C. MODBUS ADDRESSES ...........................................................80 DECLARATIONS .........................................................................................84 IC-920/-922 CONTROL SPECIFICATIONS ....................................................85
ii
Woodward
Manual 26263
IC-920/-922 Ignition Controller with ServLink
Illustrations and Tables Figure 1-1a. Panel Close-up ..................................................................................3 Figure 1-1b. IC-920 ................................................................................................4 Figure 1-1c. IC-922.................................................................................................4 Figure 1-2a. IC-920 Outline Drawing .....................................................................5 Figure 1-2b. IC-922 Outline Drawing .....................................................................6 Figure 1-3a. IC-920 View Inside Enclosure with Lid Open ....................................7 Figure 1-3b. IC-922 View Inside Enclosure with Lid Open ....................................8 Figure 1-4a. IC-920 I/O and Power Input Wiring Diagram .....................................9 Figure 1-4b. IC-922 I/O and Power Input Wiring Diagram ...................................10 Figure 1-5. MS Output Receptacle Wiring Diagram.............................................11 Figure 3-1. Speed Curve Example .......................................................................17 Figure 3-2. Ignition Timing Diagram (controls without the J1939 option) ............18 Figure 3-3. Ignition Timing Diagram (controls with the J1939 option) .................19 Figure 7-1. Null-Modem Cable .............................................................................28 Figure 9-1. CAN Bus cable connections for the D-1 Display ...............................52
Woodward
iii
IC-920/-922 Ignition Controller with ServLink
Manual 26263
Electrostatic Discharge Awareness All electronic equipment is static-sensitive, some components more than others. To protect these components from static damage, you must take special precautions to minimize or eliminate electrostatic discharges. Follow these precautions when working with or near the control. 1.
Before doing maintenance on the electronic control, discharge the static electricity on your body to ground by touching and holding a grounded metal object (pipes, cabinets, equipment, etc.).
2.
Avoid the build-up of static electricity on your body by not wearing clothing made of synthetic materials. Wear cotton or cotton-blend materials as much as possible because these do not store static electric charges as much as synthetics.
3.
Keep plastic, vinyl, and Styrofoam materials (such as plastic or Styrofoam cups, cup holders, cigarette packages, cellophane wrappers, vinyl books or folders, plastic bottles, and plastic ash trays) away from the control, the modules, and the work area as much as possible.
4.
Do not remove the printed circuit board (PCB) from the control cabinet unless absolutely necessary. If you must remove the PCB from the control cabinet, follow these precautions: •
Do not touch any part of the PCB except the edges.
•
Do not touch the electrical conductors, the connectors, or the components with conductive devices or with your hands.
•
When replacing a PCB, keep the new PCB in the plastic antistatic protective bag it comes in until you are ready to install it. Immediately after removing the old PCB from the control cabinet, place it in the antistatic protective bag.
CAUTION—ELECTROSTATIC DISCHARGE To prevent damage to electronic components caused by improper handling, read and observe the precautions in Woodward manual 82715, Guide for Handling and Protection of Electronic Controls, Printed Circuit Boards, and Modules.
iv
Woodward
Manual 26263
IC-920/-922 Ignition Controller with ServLink
Chapter 1. General Information Introduction The purpose of this manual is to aid in the installation and operation of the IC-920/-922 Ignition Controller. This manual and its contents assume that the reader has a high level of expertise on the operation of spark-ignited engines and basic understanding of electronic capacitance discharge (CD) ignition systems. DO NOT attempt to install this equipment without reading and understanding this manual. This manual contains information for two different versions of the IC-920/-922. The CANbus operation is very different between the two versions, and the Service Tool screens vary slightly or have different options.
Theory of Operation The IC-920/-922 is a modern high-energy capacitance discharge ignition system. The system consists of a 16-bit CPU and other CPU related peripherals, sensor signal conditioning circuitry, a high voltage power supply, and 20 outputs*. The system can be configured for two cylinders up to 20 cylinders. The system includes all the required software needed to configure any type of industrial engine. There is never a requirement for factory reprogramming of the IC-920/ -922 software. All user programming/configuration is completed by free IC-900 Series Service Tool software residing on a PC (personal computer). The IC-920/-922 uses information provided by the timing sensors to precisely determine the correct crank angle for firing each output. Engine ignition timing is controlled automatically or manually by various inputs, such as a manual timing potentiometer, 4–20 mA or 0–5 V signal, speed curve, or through a CAN serial link. During operation, the IC-920/-922 continuously monitors the status of the system by verifying proper information from all timing sensors and proper operation of the primary ignition circuit. Depending on the severity of a detected fault, the unit will either shut down or warn the operator. A message is transmitted in either case to a PC or optional display via a serial link. In addition to protecting the engine from ignition faults, the IC-920/-922 also includes a user programmable overspeed shutdown. The IC-920 is a CD system that stores a maximum of 180 mJ (at 100% energy setting) while the IC-922 stores a maximum of 360 mJ (at 100% energy setting). *—A 24 output option is available for 12 cylinder engines with 2 coils per cylinder.
Regulatory Compliance The IC-920/-922 control is suitable for use in Class I, Division 2, Groups A, B, C, and D, per CSA for Canada, or non-hazardous locations only.
Woodward
1
IC-920/-922 Ignition Controller with ServLink
Manual 26263
The IC-920/-922 control is suitable for use in European Zone 2, Group IIC, T4 environments per compliance with EN 50021: Electrical Apparatus for Potentially Explosive Atmospheres–Type of Protection “n”. Wiring must be in accordance with North American Class I, Division 2 or European Zone 2 wiring methods as applicable, and in accordance with the authority having jurisdiction. Field wiring must be suitable for at least 70 °C. A fixed wiring installation is required. Grounding is required by the power input PE terminal. Connect EMC ground to earth ground using low impedance connection. Do not connect more than one main power supply to any one fuse or circuit breaker. Cabling for all I/O except CAN communications is limited to 30 meters. The use of cable with individually-shielded twisted pairs is recommended. All signal lines should be shielded to prevent picking up stray signals from nearby equipment. Installations with severe electromagnetic interference (EMI) may require shielded cable run in conduit, double-shielded wire, or other precautions. Connect the shields at the control system side or as indicated by the control system wiring practices, but never at both ends of the shield such that a ground loop is created. Wires exposed beyond the shield must be less than 2 inches (51 mm). The wiring should provide signal attenuation to greater than 60 dB.
WARNING—EXPLOSION HAZARD Do not remove covers or connect/disconnect electrical connectors unless power has been switched off or the area is known to be non-hazardous. Substitution of components may impair suitability for Class I, Division 2 or Zone 2.
AVERTISSEMENT—RISQUE D’EXPLOSION Ne pas enlever les couvercles, ni raccorder / débrancher les prises électriques, sans vous en assurez auparavant que le système a bien été mis hors tension; ou que vous vous situez bien dans une zone non explosive. La substitution de composants peut rendre ce matériel inacceptable pour les emplacements de Classe I, Division 2 ou de Zone 2.
WARNING—EMERGENCY STOP The permissive start output should only be used in combination with other permissive start devices. The fuel relay shutoff should not rely solely on the permissive start output of the IC-920/-922. Do NOT use the speed switch (Trip 1 output) as the sole means of any critical control function, such as overspeed trip. Be sure to have a separate and independent shutdown device. Do NOT use the Auxiliary Shutdown (Contact A) input as a primary shutdown device. Be sure to have a separate and independent shutdown device. 2
Woodward
Manual 26263
IC-920/-922 Ignition Controller with ServLink
CAUTION—CONTACT B When using Contact B to toggle between two timing schedules (Schedule A and Schedule B), the most advanced schedule should be associated with Schedule B (switch closure). Contact B functionality needs to be verified before starting engine.
CAUTION—WIRING Due to the hazardous location listings associated with this product, proper wire type and wiring practices are critical to operation. Do not connect any cable grounds to “instrument ground”, “control ground”, or any non-earth ground system. Make all required electrical connections based on the wiring diagrams (Figures 1-3, 1-4, and 1-5).
WARNING—DETONATION Detonation (knock) is an abnormal combustion condition that can cause personal injury and/or property damage. Improper air/fuel ratio and improper ignition timing are major causes of detonation. Improper ignition system setups, improper variable timing signals applied by an external control or faults in the ignition system can all be a source of detonation. A detonation (knock) detection or other combustion fault shutdown device should be used.
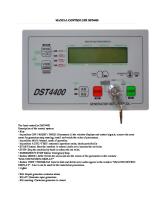
Figure 1-1a. Panel Close-up
Woodward
3
IC-920/-922 Ignition Controller with ServLink
Manual 26263
Figure 1-1b. IC-920
Figure 1-1c. IC-922 4
Woodward
Manual 26263
IC-920/-922 Ignition Controller with ServLink
Figure 1-2a. IC-920 Outline Drawing
Woodward
5
IC-920/-922 Ignition Controller with ServLink
Manual 26263
Figure 1-2b. IC-922 Outline Drawing
6
Woodward
Manual 26263
IC-920/-922 Ignition Controller with ServLink
Figure 1-3a. IC-920 View Inside Enclosure with Lid Open
Woodward
7
IC-920/-922 Ignition Controller with ServLink
Manual 26263
Figure 1-3b. IC-922 View Inside Enclosure with Lid Open
8
Woodward
Manual 26263
IC-920/-922 Ignition Controller with ServLink
Figure 1-4a. IC-920 I/O and Power Input Wiring Diagram Woodward
9
IC-920/-922 Ignition Controller with ServLink
Manual 26263
Figure 1-4b. IC-922 I/O and Power Input Wiring Diagram 10
Woodward
Manual 26263
IC-920/-922 Ignition Controller with ServLink
Figure 1-5. MS Output Receptacle Wiring Diagram
Woodward
11
IC-920/-922 Ignition Controller with ServLink
Manual 26263
Chapter 2. Timing Sensors Introduction The IC-920/-922 requires two timing sensors for a two-cycle engine and three for a four-cycle engine.
Trigger Timing Sensor The trigger timing sensor is typically a magnetic pickup (MPU) sensor. It senses ring gear teeth or holes or pins in the flywheel. The trigger MPU performs two functions: it measures engine speed and, in conjunction with the reset timing sensors, it determines the angular position of the crankshaft. Type—Normally the MPU is a variable reluctance type (passive), but other types can be used (passive or active). Location—The location, relative to TDC (top dead center) of the engine, is not critical. Mounting—The preferred orientation of the sensor is orthogonal (at a right angle) to the circumference of the flywheel/ring gear. In small and mid-size engines, there is usually a place on the housing/shroud of the ring gear for a hole to be drilled and tapped for the sensor. This is an ideal location. If a mounting bracket is required, it must be designed to be stiff (natural frequency >33 Hz). A vibrating bracket could cause erroneous signals to be generated by the sensor that will be detected by the IC-920/-922 and will cause the IC-920/-922 to shut down. Wiring—See Figure 1-4. Voltage Range—Min voltage 6 V p-p (2.1 Vrms), max voltage 80 V p-p. Gear Teeth Range—60–500. Air Gap—Typically the voltage range requires an air gap setting between 0.020 and 0.040 inch (0.51 and 1.02 mm) (1/3 to 3/4 turn for a 5/8”-18 MPU). To ensure proper operation, the flywheel or ring gear must have at least 60 teeth and the MPU must be able to generate a 6 V p-p (2.1 Vrms) signal at cranking speed.
Reset Timing Sensor The reset timing sensor is typically a magnetic pickup sensor (MPU). The reset MPU identifies a starting location from which all measurements of the trigger MPU starts. The reset MPU senses an index marker or event (hole or projection) on the flywheel. Only one event per crankshaft revolution (360 degrees) is permitted. This marker should be between 10 and 120 degrees in advance of #1 cylinder TDC.
12
Woodward
Manual 26263
IC-920/-922 Ignition Controller with ServLink
NOTE The location must be at least 10 degrees more advanced than the most advanced firing angle of the #1 cylinder. When determining the reset sensor location, it is recommended to add 20–50 degrees to the most advanced firing angle of the #1 cylinder. This will help to make sure the most advanced timing required is not restricted by the sensor being too close. The exact location is not critical, but the actual positions must be programmed into the IC-920/-922. Type—Normally the MPU is a variable reluctance type (passive), but other types can be used (passive or active). Location—The location relative to TDC of the engine #1 cylinder is not critical, but the relationship must be known. Example: If the engine runs at 22 degrees BTDC (before TDC), then the reset position must be at least 22 +10 = 32 degrees BTDC. In this example, the reset location could be anywhere from 32° to 120° BTDC. Mounting—The proper location of the reset MPU is relatively easy if the following steps are followed: 1. Locate where you want to mount the reset MPU, inspect the entire circumference of the flywheel to ensure that there are no gouges, dents, or barring holes that could be detected by the sensor. Once you are satisfied that the surface is clean, perform the following: 2. Drill a small pilot hole in the flywheel housing where the reset MPU is to be mounted or into a separate mounting bracket. If applicable, first drill and tap bolt holes to secure the mounting bracket to the engine or the floor. 3. Manually rotate the engine until the timing mark for #1 cylinder is aligned with your most advanced running condition. 4. Rotate the engine at least 10 degrees opposite the normal rotation of the engine. Record the sum of number of degrees rotated plus the most advanced timing. Example: If the most advanced is 22 degrees BTDC and the engine was rotated an additional 10 degrees, record 32 degrees (32=22+10). 5. Now inspect the location of the trigger MPU relative to the teeth or holes it is sensing. For optimum performance, the trigger MPU should be equally spaced between teeth when the reset MPU is aligned with its target. If this is not the case, manually rotate the engine an additional amount so that the trigger MPU is between two teeth. Then, with the same small drill bit, using the previously drilled pilot hole in the shroud/bracket as a guide, drill into the flywheel. Once the depth of the hole is sufficiently deep to act as a guide, the engine may be rotated to get better access to the flywheel to complete the drilling. If the surface area is smooth and free of any nicks, burrs, or gouges, then a hole could be used as the index or target. The hole should be enlarged to 0.5 inch (13 mm) diameter with a depth of at least 3/8 inch (9.5 mm).
Woodward
13
IC-920/-922 Ignition Controller with ServLink
Manual 26263
If the surface is not smooth, then the index or target needs to be above the rotating surface of the flywheel. One easy method to do this is to drill and tap for a hex head bolt (1/4-20, 6 mm or similar). With an additional locking (jam) nut, screw in the bolt. The height of the hex head should be at least 3/4 inch (19 mm) above any nicks, burrs, or gouges. Lock the bolt in place by tightening the jam nut. 6. Now drill and tap the flywheel housing or mounting bracket pilot hole for the reset MPU. 7. Install and GAP the MPU.
CAUTION—PROPER CLEARANCE Manually rotate the engine one complete revolution to ensure that there is enough clearance between the bolt and any part of the housing, shroud or other mechanical part of the engine. Wiring—See Figure 1-4. Voltage Range—Min voltage 6 V p-p (2.1 Vrms), max voltage 80 V p-p. Index Marker—One per crankshaft revolution. Air Gap—Typically the voltage range requires an air gap setting between 0.020 and 0.040 inch (0.51 and 1.02 mm) (1/3 to 3/4 turn for a 5/8”-18 MPU). To ensure proper operation, the reset MPU must be able to generate a 6 V p-p (2.1 Vrms) signal at cranking speed.
Cam Timing Sensor The cam timing sensor is typically an active sensor. It is required only for fourstroke engines. If your engine is two-stroke, skip this section. The cam timing sensor is used to determine which cycle the engine is on. This sensor must be mounted to sense a marker or event (hole or projection) that occurs once every 720 degrees of crankshaft rotation (two crankshaft revolutions) or once every camshaft revolution. Location—The mounting location is relative to the reset sensor location and the cycle of the engine. The cam sensor should be mounted at least 20 degrees more advanced than the reset MPU on the compression stroke of the #1 cylinder. The cam sensor must not be located more than 350 degrees before TDC on the compression stroke of the #1 cylinder. Example: If the engine runs at 22 degrees BTDC, then the reset sensor position must be at least 22+10=32° BTDC of #1 cylinder. In this example, the reset sensor location could be mounted anywhere from 32 to 120° BTDC. If the reset sensor is located 32° BTDC then the cam sensor position could be mounted between 52° and 350° BTDC. If the reset sensor is located 120° BTDC then the cam sensor could be mounted between 140° and 350° BTDC. Air Gap—Typically 0.030 to 0.060 inch (0.76 to 1.52 mm) (1/2 to 1 turn for a 5/8”-18 sensor). 14
Woodward
Manual 26263
IC-920/-922 Ignition Controller with ServLink
Type—Normally the cam sensor is a zero-velocity sensor (active pickup). Mounting—Identify a gear or shaft that rotates at camshaft speed (1/2 engine speed). Choose a location where the sensor can be mounted at a right angle to the marker or event (hole/bolt). The CAM input is triggered on a positive edge. If a hole is used to pulse the CAM sensor, the hole has to be sized large enough to provide a useful pulse. Wiring—See Figure 1-4.
Woodward
15
IC-920/-922 Ignition Controller with ServLink
Manual 26263
Chapter 3. Timing Controls Introduction The IC-920/-922 has embedded in its operating program sophisticated yet simple-to-use timing control features: • Manual timing potentiometers (2) • 4–20 mA or 0–5 V input • Timing vs. Speed curve • Timing controlled via CANbus network • Individual cylinder timing
NOTE The actual timing of the engine could be controlled by any single control input or any combination. The 4–20 mA and potentiometer timing adjustment are disabled in CAN mode.
CAUTION—START-UP The IC-920/-922 must be correctly programmed for the engine application prior to any attempt to start the engine. All the features in this chapter require proper timing ranges to be set. See Chapter 8.
Manual Timing Adjustment The IC-920/-922 has two integrally mounted four-turn potentiometers to adjust the timing. The span is controlled by limits programmed by the user. An authorization code (password) must be used to change the limits (see Chapter 8). The default condition (contact B open) is for potentiometer A to be active. If contact B is switched to ground and schedule B is enabled in the programming menu, then potentiometer B is active. The operator sets the span of each potentiometer by programming the desired timing at the fully counterclockwise and clockwise position. Additionally, the total timing of the potentiometer + 4–20 mA + Speed Curve timing is limited by the maximum amount of advance and retard that is programmed. The manual timing adjustments programmed are relative to TDC of the engine. Each pot independently sets the Global Timing for schedule A and B. Please refer to timing diagram Figure 3-2 at the end of this chapter. When J1939 CAN is enabled, the only method of timing adjustment is with the CANbus message, Global Timing and Energy.
4–20 mA or 0–5 V Input The 4–20 mA or 0–5 V input is normally used to adjust the timing automatically by measuring certain engine performance parameters. A good example of this would be a pressure-to-current (P/I) converter that measures the boost pressure or manifold air pressure. The change in timing based on the change in current is user programmable. The operator programs the desired timing change at 4 mA and at 20 mA or 0 V and 5 V. The IC-920/-922 interpolates linearly between these two points. Timing changes caused by the 4–20 mA or 0–5 V input are relative to the global timing set by the manual timing adjustment. Please refer to timing diagram Figure 3-2 at the end of this chapter. 16
Woodward
Manual 26263
IC-920/-922 Ignition Controller with ServLink
NOTE The user is required to input a "default" 4–20 mA timing change setting that provides for safe operation, should this input signal fail. The 0–5 V input does not have a default setting. The value programmed for 0 V is used. When J1939 CAN is enabled, the only method of timing adjustment is with the CANbus message, Global Timing and Energy.
Speed Curve The IC-920/-922 has the ability to change the timing of the engine based on engine speed. Normally this is a non-linear relationship, so the IC-920/-922 provides up to five breakpoints to assist in establishing a piece-wise linear relationship. Timing changes caused by the speed curve are relative to the global timing established by schedule A, schedule B or CAN. See Figure 3-1.
Ignition Timing Degrees Retard
Speed Curve 15 10 5 0 0
500
1000
1500
2000
Engine Speed
Figure 3-1. Speed Curve Example
When J1939 CAN is enabled, the only method of timing adjustment is with the CANbus message, Global Timing and Energy.
Timing Schedules A and B—Contact B Input The IC-920/-922 also provides the ability to program two different timing schedules: Schedule A and Schedule B. The schedules are selected by a contact closure to ground (Contact B). Pot A is tied to schedule A, and Pot B is tied to schedule B. A good example of the use of dual timing schedules includes applications where two fuel types are used (for example, methane and propane). Refer to timing diagram Figure 3-2 at the end of this chapter. Example: Schedule A timing could consist of: Pot A+4–20 mA or 0-5 V+Speed Curve. Schedule B timing could consist of only Pot B.
Woodward
17
IC-920/-922 Ignition Controller with ServLink
Manual 26263
CAUTION—CONTACT B When using Contact B to toggle between two timing schedules (Schedule A and Schedule B), the most advanced schedule should be associated with Schedule B (switch closure). Contact B functionality needs to be verified before starting engine. There is no Schedule B or contact B functionality with the J1939 CAN enabled. When J1939 CAN is enabled, the only method of timing adjustment is with the CANbus message, Global Timing and Energy.
Timing Control Adjustments Diagram, Non J1939 The timing of any cylinder can be changed by a fixed amount relative to the Global Timing (pot, 4–20 mA or 0–5 V, or speed curve). The adjustable range is limited to ±3 degrees. The primary purpose of this control is to negate any ill effect of manifold design or other factors that generally cause one or two cylinders to be more sensitive to detonations than others. This feature allows the operator to run the engine at a more advanced timing setting than it would normally be able to, by retarding the one or two cylinders that tend to detonate first. Refer to Chapter 7, “Adjusting Individual Cylinder Timing Offset Settings” for adjustment instructions. 4-20mA HW
CAN (Display)
Timing @ 4mA SW Timing @ 20mA SW Loss Signal SW
No Analog Adjust Analog Select SW
Pot A HW
IC-920/-922 Timing Diagram
CCW timing A SW CW timing A SW
+
Analog A SW
0-5V HW
Schedule A Summing Junction Cylinder Offset SW Setting for each cylinder SW
Speed Curve A SW
Timing at 0V SW Timing at 5V SW
Speed Curve SW
open
disable
close
Disable Schedule B SW
Contact B Switch HW
0 to 5 points (speed, timing) SW
Max Limits SW
+
Max Retard SW Max Advance SW
Speed Curve B SW
+
Cylinder Timing
Timing Setup SW Sequence # SW # of Cylinders SW Reset Position SW
Analog B SW
+
Schedule B Summing Junction
Pot B HW CCW timing B SW CW timing B SW
Timing Signal HW Trigger MPU HW Reset Pulse HW Cam Pulse HW
Figure 3-2. Ignition Timing Diagram (controls without the J1939 option) 18
Woodward
Manual 26263
IC-920/-922 Ignition Controller with ServLink
Timing Control Adjustments Diagram, J1939 enabled All timing adjustments are made via the CANbus when J1939 is enabled. The IC-92x operates as a slave and needs to receive the Global Timing and energy before it will run. The Individual timing offsets are set to 0 at power-up for CANbus operation.
Individual Cylinder Timing Controls, with J1939 The timing of any cylinder can be changed by a fixed amount relative to the Global Timing. The adjustable range is limited from –10 to +3 degrees. If the CANbus is enabled, it is not possible to adjust the Individual Cylinder Timing with the service tool. It must be adjusted via the CANbus (refer to Chapter 10 for CANbus information).
IC-920/-922 Timing Diagram With J1939 CAN Schedule A Summing Junction Cylinder Offset SW CAN Global Timing and Energy
Setting for each cylinder SW
Max Limits SW
+
Max Retard SW Max Advance SW
+
Cylinder Timing
Timing Setup SW Sequence # SW # of Cylinders SW Reset Position SW
Timing Signal HW Trigger MPU HW Reset Pulse HW Cam Pulse HW
Figure 3-3. Ignition Timing Diagram (controls with the J1939 option)
Woodward
19
IC-920/-922 Ignition Controller with ServLink
Manual 26263
Chapter 4. Input Power and Ignition Coil Primary Outputs Input Power Requirements The IC-920/-922 power requirements are as follows: Input Voltage Range Transient Voltage Range* Average Current Draw Peak Current Draw Current Draw Equation
18 to 32 Vdc Steady State 10 to 32 Vdc (for less than 1 minute) IC-920: 5 A max IC-922: 10 A max 30 A @ 100% energy IC-920: A = (rpm * outputs) / (stroke * 1800) IC-922: A = (rpm * outputs) / (stroke * 900)
NOTE To prevent current draw from exceeding the maximum level, the maximum engine speed for 2-cycle engines is limited to 900 rpm with 20 outputs or 750 rpm with 24 outputs, and engine speed for 4-cycle engines is limited to 1800 rpm with 20 outputs or 1500 rpm with 24 outputs. Current Draw Examples: IC-920: 1. For 1800 rpm, 20 outputs, 4-stroke: (1800 * 20) / (4 * 1800) = 5 A 2. For 330 rpm, 10 outputs, 2-stroke: (330 * 10) / (2 * 1800) = 0.92 A IC-922: 1. For 1800 rpm, 20 outputs, 4-stroke: (1800 * 20) / (4 * 900) = 10 A 2. For 330 rpm, 24 outputs, 2-stroke: (330 * 24) / (2 * 900) = 4.4 A *—100% energy set point may not be achieved at input voltages less than 18 V.
Input Power Fuse Requirements IC-920 Input power
6 A slow blow fuse in each power line near the power supply.
IC-922 Input Power
12 A slow blow fuse in each power line near the power supply.
NOTE Each input power line needs to be fused.
Input Power Wiring Requirements In order for the IC-920/-922 to perform within specification over the input voltage range of 18–32 Vdc, a low resistance input power harness is required. See the table at the end of this chapter for maximum wiring length vs. wire size, and see Figure 1-4. 20
Woodward
Manual 26263
IC-920/-922 Ignition Controller with ServLink
High Voltage Power Supply The IC-920 contains two high voltage capacitive discharge power supplies, and the IC-922 contains four that are capable of charging to a max of 300 V. One supply (or one pair) is dedicated to the odd cylinders, and the other to the even cylinders. This allows for simultaneous firing of two ignition outputs. The energy level control for each power supply is independent of the other. The range of adjustment is 100 V (10% energy) to 300 V (100% energy). Voltage signals proportional to the charge voltages can be monitored at the Monitor Outputs. The signal at each output connector is approximately a 10:1 reduction of the charge voltage. The IC-920 contains one monitor output per bank (odd bank, even bank), while the IC-922 contains two monitor outputs per bank (two per odd bank and two per even bank).
Ignition Coil Primary Outputs CAUTION—SEPARATE SHUTDOWN DEVICE A separate combustion fault shutdown device should be used in the system to detect misfires resulting from any primary wiring fault. Primary wiring provides the connection between the IC-920/-922 ignition outputs and the CD ignition coil primary windings. These connections contain high voltage (up to 300 V) and high pulsating currents. See Figure 1-5 for a 16-cylinder wiring example and for the complete connector wiring diagram.
Odd Bank Connector The connector for the odd bank of cylinders is a 17-pin circular connector. The cylinders associated with this connector are 1st cylinder in firing order, 3rd cylinder in firing order, 5th cylinder in firing order, and so forth. These connections are made to the positive terminal on the primary of the ignition coil. See Figure 1-5, J2-ODD.
Even Bank Connector The connector for the even bank of cylinders is a 14-pin circular connector. The cylinders associated with this connector are 2nd cylinder in firing order, 4th cylinder in firing order, 6th cylinder in firing order, and so forth. These connections are made to the positive terminal on the primary of the ignition coil. See Figure 1-5, J1-EVEN.
Ignition Coil Primary Output Wiring The use of undersize wiring between the IC-920/-922 and the ignition coil primaries may result in degraded ignition performance. See the table below for maximum wiring length vs. wire size. Minimum Wire Size: 18 AWG (1 mm²). See tables below. Voltage Rating: Input Power and Ignition Output (primary) wiring 600 V. Woodward
21
IC-920/-922 Ignition Controller with ServLink
Manual 26263
500 rpm, 2-Stroke Cycle 2-ohm Coil Primary (Woodward Black Coil) 20 Channel Wire Size (AWG) 12 14 16 18
920 Maximum Input Power Length (ft) 133 84 53 33
920 Maximum Ignition Output Length (ft) NA NA 61 39
922 Maximum Input Power Length (ft) 67 42 26 17
922 Maximum Ignition Output Length (ft) NA NA 61 39
500 rpm 2- Stroke Cycle 2-ohm Coil Primary (Woodward Black Coil) 20 Channel Wire Size (mm2) 4 2.5 1.5 1
920 Maximum Input Power Length (m) 50.1 31.3 18.8 12.5
920 Maximum Ignition Output Length (m) NA NA 21.8 14.5
922 Maximum Input Power Length (m) 25.1 15.7 9.4 6.3
922 Maximum Ignition Output Length (m) NA NA 21.8 14.5
NOTE These tables assume a 0.5-ohm worse case total resistance (25 deg C) in the Primary ignition wiring (plus and return) and a 1.5V worse case voltage drop on the Power input wiring (plus and return).
CAUTION—CHECK WIRING When replacing an existing ignition system, carefully inspect primary wiring. If the insulation shows any sign of wear or fatigue, the wiring should be replaced.
22
Woodward
Manual 26263
IC-920/-922 Ignition Controller with ServLink
Chapter 5. Energy Control Introduction The IC-920/-922 is capable of delivering a substantial amount of energy to the ignition coil/spark plug. Most rich-burn or lean-burn engines with pre-combustion chambers do not need a substantial amount of energy with new spark plugs. Lean burn engines without pre-combustion chambers need more spark energy to ensure proper ignition of the fuel-air mixture. Because of the unique circumstances for each engine configuration, the IC-920/-922 allows run time energy adjustment for each (odd and even) primary output.
Manual Energy Control Start by setting the Even and Odd Energy Maximum value on the IC-920/-922 at 65% energy. This setting typically provides enough energy for good combustion without being excessive. If desired, decrease or increase the energy settings to obtain optimum spark duration. The energy settings may be increased as needed to compensate for normal spark plug wear. The energy may be adjusted with the RS-232 or the CANbus. The service tool adjustment is disabled when J1939 CAN is enabled.
Woodward
23
IC-920/-922 Ignition Controller with ServLink
Manual 26263
Chapter 6. Engine Controls and Safety Features Introduction The IC-920/-922 has built-in features that protect the engine if any malfunction related to the ignition system is detected: • Overspeed Protection • Permissive Start Output • Auxiliary Shutdown Input • Misfire Limit • Timing Sensor Fault Detection • Alarm Output
Overspeed Protection Integral to the IC-920/-922 is overspeed protection. The user can program the exact speed at which the ignition should stop (see Chapter 8). The power must be cycled to reset this shutdown.
WARNING—OVERSPEED The engine, turbine, or other type of prime mover should be equipped with an overspeed shutdown device to protect against runaway or damage to the prime mover with possible personal injury, loss of life, or property damage. The overspeed shutdown device must be totally independent of the prime mover control system. An overtemperature or overpressure shutdown device may also be needed for safety, as appropriate.
Permissive Start Output Integral to the IC-920/-922 is a solid-state output, capable of sinking 250 mA, that should be used to enable/disable fuel flow to the engine directly or in combination with other devices (lube oil pressure, etc.). Anytime the ignition stops due to a normal stop sequence, overspeed, or a detected fault, the Permissive Start output will de-energize. Upon start-up, the Permissive Start output will not energize until all timing signals are verified correct and the ignition starts firing. (see Figure 1-4). An LED provides a visual indication of the Permissive Start output status (see Appendix A).
WARNING—EMERGENCY STOP The permissive start output should only be used in combination with other permissive start devices. The fuel relay shutoff should not rely solely on the permissive start output of the IC-920/-922.
24
Woodward
Manual 26263
IC-920/-922 Ignition Controller with ServLink
Auxiliary Shutdown Input—Contact A The IC-920/-922 provides a low voltage, low current method of shutting down the ignition system using a PLC or similar device. If Contact A of the control inputs is closed to ground, the ignition outputs will not fire. If Contact A is closed above the fuel shutoff threshold speed, it is necessary for the rpm to go to zero before the outputs will fire again when the contact is opened. If Contact A is open below the fuel shutoff threshold speed, the ignition will fire immediately once the trigger, reset, and cam signals are valid (see Figure 1-4).
WARNING—EMERGENCY STOP Do NOT use the Auxiliary Shutdown input as a primary shutdown device. Be sure to have a separate and independent primary engine shutdown device.
Misfire Limit Integral to the IC-920/-922 is primary misfire detection. The IC-920/-922 measures the misfires per second and compares this to a user-specified maximum misfire rate and will shutdown the ignition if this rate is exceeded (see Chapter 8). The power must be cycled to reset this shutdown. Misfire detection is not activated below the Fuel Shutoff Threshold setting. When a misfire is detected, it indicates there is no current flowing to the primary of the ignition coil. This feature does not detect ignition secondary or combustion misfires.
WARNING—MAXIMUM MISFIRE RATE Disabling the Maximum Misfire Rate could lead to an unsafe operating condition if an open circuit occurs in the primary wiring. In the case of a broken primary return wire an entire output (odd or even) to multiple coils could be lost. The PC service tool Misfire page or optional display shows the rate as misfires per second. See Chapter 7, for an illustration of the Misfire page.
Timing Sensor Fault Detection The IC-920/-922 constantly scans the timing sensor inputs for a fault. If a fault is detected, the ignition will shut down. The power must be cycled to reset this shutdown. The IC-920/-922 also sends the fault information on the RS-232 and CANbus serial links. See Chapter 12 for sensor input fault error message descriptions.
Speed Switch The IC-920/-922 provides one speed switch, called Trip 1. The trip point is adjustable from 0 to 5000 rpm. The speed switch has a separately adjustable Hysteresis trip point, with a range from 0 to 5000 rpm. The switch changes states when engine speed exceeds the trip point, and the switch is reset when engine speed goes below the trip point minus the hysteresis value. If the hysteresis value is equal to or greater than the trip speed setting, the output is reset at 0 rpm.
Woodward
25
IC-920/-922 Ignition Controller with ServLink
Manual 26263
The Trip1 status LED is illuminated when the Trip 1 contact is closed and turned off when the Trip 1 contact is open.
WARNING—EMERGENCY STOP Do NOT use the speed switch as the sole means of any critical control function, such as overspeed trip. Be sure to have a separate and independent shutdown device.
Alarm Output The IC-920/-922 provides one alarm output, called Trip 2. The alarm output is hard coded to close at power-up when no alarm condition exists and to open with any an alarm condition. The alarm switch remains closed when Contact A is closed (shutdown request). The alarm conditions tied to Trip 2 are faults that will cause the ignition control to stop firing. These following faults cause the alarm output to open: • Overspeed • Sensor Input Fault • Excessive Misfire Rate • Corrupt Firing Interval Table • SCR Fault • Loss of power The Ignition Status on the PC service tool or on an optional display will list the specific condition causing the alarm. The Trip 2 status LED is illuminated when the Trip 2 contact is closed and turned off when the Trip 2 contact is open. See Figure 1-4 for the Permissive (Safety) Start Output, Speed Switch (Trip 1) and Alarm Switch (Trip 2) wiring diagram. See Control Specifications inside the back cover for output types and ratings.
26
Woodward
Manual 26263
IC-920/-922 Ignition Controller with ServLink
Chapter 7. IC-900 Series Service Tool Introduction The IC-920/-922 is a versatile ignition control that is user configurable for a variety of engine installations. A single IC-920/-922 ignition control can be configured to fit numerous engine makes, models, and sizes. The IC-900 Series Service Tool is a Windows-based software tool that is used to configure, monitor, and troubleshoot an IC-920/-922 ignition system. It runs on a personal computer and communicates with the IC-920/-922 ignition control through a serial connection. The IC-900 Series Service Tool software can be downloaded free from the Woodward website at www.woodward.com/software/software.cfm under Ignition System Tools. Click Go, then select IC 900 Series Service Tool, Download OR More Info for download instructions. The Service Tool software detects whether the IC-92x has the J1939 CAN or not, and displays screens and options for the version of the control. All configuration settings are shown in an intuitive graphical interface format. Configuration, for initial setup or replacement, is a straightforward process. Settings can be saved directly into the IC-920/-922 EEPROM or to a file. Settings from a file can be loaded into the IC-920/-922 ignition control for quickly configuring ignition controls for all like engines within a manufacturing facility, a plant, or a system.
Required Equipment To program the IC-920/-922, the following items are needed: • 12 to 24 Vdc power supply • RS-232 null modem cable • PC / Laptop • IC-900 Series Service Tool software
WARNING—TRAINED PERSONNEL An unsafe condition could occur with improper use of these software tools. Only trained personnel should have access to these tools.
CAUTION—VERIFY PARAMETERS The IC-920/-922 must be programmed prior to any attempt to start the engine. It is important and critical that all parameters be correctly set for the engine application.
System Requirements • • • • • Woodward
Microsoft Windows 95, 98, Me, NT 4.0, 2000, XP 300 MHz Pentium CPU 64 MB RAM 800 by 600 pixel screen Serial Port 27
IC-920/-922 Ignition Controller with ServLink
Manual 26263
Configuration Programming Procedure NOTE ABOUT PROGRAMMING All the control parameters described in this section have an acceptable range for parameter values. Attempting to enter values outside of the acceptable range will cause the last valid entry to be used. A valid range is shown on the Status Bar when a parameter value is selected.
NOTE The screen shots shown in this manual are subject to change and may be modified without notice.
Establishing Communications To establish communication between the IC-900 Series Service Tool and the IC-920/-922 ignition control, connect a null modem cable (see Figure 7-1) between the RS-232 port on the IC-920/-922 and a serial port on the personal computer. Connect a +12/24 Vdc supply to the IC-920/-922 (see Figure 1-4). From the IC-900 Series Service Tool menu bar select Communication, Connect….
CAUTION—DB9 CONNECTORS The IC-920/-922 has two DB9 connectors. Identify and use the one marked “RS-232”.
Figure 7-1. Null-Modem Cable
You will be prompted to select a serial port. The service tool will attempt to connect to the IC-920/-922 using the selected serial port, and the communication status message in the status bar will change from Not Connected to Connecting. Once the connection is established, the communication status message in the status bar will change to Connected and the service tool will begin to display live information from the IC-920/-922. 28
Woodward
Manual 26263
IC-920/-922 Ignition Controller with ServLink
If the communication connection is lost, the service tool attempts to re-establish the connection. While the service tool is re-establishing the connection, the communication status bar displays Connecting. A connection will be lost if the IC-920/-922 loses power or the serial cable is disconnected. You may stop communication between the service tool and IC-920/-922 at any time by selecting Communication, Disconnect from the menu bar of the IC-900 Series Service Tool. When the service tool is disconnected, the window is grayed and parameters are frozen at their last value.
WARNING—SERIAL CABLE SWITCHING Switching the serial cable from one IC-920/-922 to another while the communication status is connected may result in invalid data being read from and/or written to the IC-920/-922. Always Disconnect the IC-900 Service Tool before plugging the serial cable into a different IC-920/-922.
IC-900 Series Service Tool Overview The service tool main window organizes information about the IC-920/-922 into an overview area and a set of tabbed pages. Each page contains detailed monitoring information and a few adjustments. The main window is visible while the service tool is running, however values are not displayed until the service tool is connected to an IC-920/-922 ignition. To view information on a specific page, click on that page tab. The overview status and monitoring parameters common to all pages include Ignition Status, Engine Speed, Total Timing, Engine Run Time, Average Energy and the shutdown Contact A position. For the J1939 CAN controls, there is a J1939 CAN Status line also. A menu bar is located across the top of the window and a status bar is located across the bottom. The main window opens with the Energy Level page visible as shown below. Tabs are provided to open other pages that show additional ignition system information and tunable parameter settings. The service tool screens are slightly different between the J1939 CAN controls and the ones without J1939 CAN. The screens for the controls with J1939 CAN are shown in the J1939 CAN controls section (Chapter 10).
Woodward
29
IC-920/-922 Ignition Controller with ServLink
Manual 26263
Energy Levels Page The Energy Level page shows the energy level (%) as a bar graph display for monitoring the energy level of each coil output. Energy settings for the coil outputs (odd and even) and alarm level settings are displayed also. Edit Energy Control and Edit Graph Levels buttons provide a means for adjusting the energy and energy alarm level settings. Adjusting Energy Control Settings If the J1939 CAN is enabled, the “Edit Energy Control…” will not be available. The energy level is manually set to operate at a fixed energy level. To change the energy level settings, click the Edit Energy Control button. You will be prompted for a password. The password is run time hours + 10.
Once the correct password is entered, the Energy Control window opens to allow energy setting changes. 30
Woodward
Manual 26263
IC-920/-922 Ignition Controller with ServLink
Highlight and type the desired energy setting (%) for the Even and Odd outputs. When editing numeric parameters, you must press enter or select another item to accept the change. Level changes take affect immediately when they are entered. Click on the Close button to save the new settings to the IC-920/-922 control. Adjusting Graph Level Settings Energy graph level alarms are provided on the energy bar graph. To change the energy alarms level settings; click the Edit Graph Levels button. You will be prompted for a password.
Once the correct password is entered, the Energy Graph Levels window opens to allow alarm level setting changes. Highlight and type the desired setting (%) for the parameters listed. When editing numeric parameters, you must press enter or select another item to accept the change. Click on the Close button to save the new settings to the IC-920/-922 control. The alarm level settings appear as dashed lines on the energy levels bar graph. An alarm condition toggles individual energy level bar color from light blue to red. The alarm conditions are provided as follows: • The Failure Level is an absolute energy level setting that indicates a maximum energy level has been demanded and there is no remaining energy in reserve. • The Warning Level is an absolute energy level setting that indicates a maximum energy level is being approached. • The High-High Level and Low-Low Level settings are differential alarms that indicate a significant deviation from the average energy level. • The High Level and Low Level are differential alarms that indicate a small deviation from the average energy level.
Woodward
31
IC-920/-922 Ignition Controller with ServLink
Manual 26263
Configuration Page Viewing IC-920/-922 Configuration The Configuration page shows the current control configuration settings. A scroll bar is provided on this screen to allow viewing all configuration settings. To change the control configuration, click the Change Configuration button. The configuration can be opened from the control while the engine is running for editing or saving to a file. However, an existing, new or modified configuration cannot be loaded to the control while the engine is running. The engine must be stopped to load a configuration to the control. Refer to Configuring the IC-920/-922 for more details on configuration.
32
Woodward
Manual 26263
IC-920/-922 Ignition Controller with ServLink
Timing Page The Timing page shows all timing settings including individual cylinder timing offset settings. The Edit Timing Offset button provides a way to achieve precise ignition timing for each cylinder or to offset the timing of a particular cylinder to possibly compensate for combustion anomalies (e.g., detonation).
NOTE All individual cylinder timing changes affect the global timing established by timing schedules A and B. Individual Cylinder Timing Offsets are not adjustable with the service tool if J1939 CAN is enabled. Adjusting Individual Cylinder Timing Offset Settings To change the individual cylinder timing offsets, click the Edit Timing Offsets button. You will be prompted for a password.
Woodward
33
IC-920/-922 Ignition Controller with ServLink
Manual 26263
Once the correct password is entered, the Timing Offsets window opens to allow timing offset changes.
WARNING—FIRING ORDER SEQUENCE The coils are listed by firing order sequence and not engine cylinder number sequence. Be sure to make the correct correlation to an actual engine cylinder before adjusting any timing offsets. • •
Offset—This is the Timing OFFSET, in crank angle degrees, to be applied to the global ignition timing. This is NOT an absolute timing setting. Enter the desired timing offset. Units—Select either Advance or Retard for applying the timing offset setting.
When editing numeric parameters, you must press enter or select another item to accept the change. Timing offset changes take affect immediately when entered. This allows verification, by timing light, the timing is correct before closing the Timing Offsets window. Click on the Close button to save the new settings to the IC-920/-922 control.
34
Woodward
Manual 26263
IC-920/-922 Ignition Controller with ServLink
Misfire Page The Misfire page displays Misfires/Second and Indicators adjacent to each coil change from gray to a bold red color when a misfire occurs. Failure to discharge the capacitor (no current flow), upon demand, is a misfire. While this also causes a combustion misfire, other factors related to the air and fuel delivery systems also cause combustion misfire. Ignition misfire is not equal to combustion misfire.
Identification Page The Identification page shows the IC-920/-922 ignition control software part number, revision level and serial number. Refer to this part number, revision level and serial number in any correspondence with Woodward.
Woodward
35
IC-920/-922 Ignition Controller with ServLink
Manual 26263
Chapter 8. Configuring the IC-920/-922 Introduction The IC-900 Series Service Tool is used to create, edit and load all configuration settings into the IC-920/-922 ignition control.
WARNING—VERIFY CORRECT PARAMETERS The IC-920/-922 must be configured prior to any attempt to start the engine. It is important and critical that all parameters be set correctly for the engine application. An improperly calibrated ignition could cause extensive engine damage and possible serious injury. Configurations can be created, opened, edited, and loaded to the IC-920/-922 using the Configuration Editor window. There are a number of configuration methods available for creating, opening, editing and loading the IC-920/-922 configuration: • Create a New Configuration • Open and Edit a Saved Configuration File • Open and Edit the Existing Control Configuration • Loading a Configuration File Editing a configuration does not require a connection to the IC-920/-922. However, changes to a configuration in the Configuration Editor do not take affect until the configuration is loaded to the IC-920/-922. The following describes the various methods of configuring the IC-920/-922 Ignition Control: Create a New Configuration On the menu bar of the IC-900 Series Service Tool window, select File, New Configuration.
A Configuration File Editor opens with an incomplete configuration ready for edit to create a new IC-920/-922 configuration.
WARNING—24 CYLINDER FIRING SEQUENCE Any firing sequence with 24 cylinders or outputs must have a 24-output power board. This is designated with a special part number that is different from the standard 20-output IC-920/-922. NOTE—At present, there is no 24output version of the IC-922. 36
Woodward
Manual 26263
IC-920/-922 Ignition Controller with ServLink
The Configuration File Editor organizes configuration settings into a set of four (4) tabbed pages: Engine, Timing, Speed and CAN. To open a specific configuration page, click that page tab.
Engine Configuration Page Firing Sequence The firing sequence is not entered directly but instead is derived from the number of coils and firing intervals. The total number of coils used by the engine, the strokes and number of coils per cylinder must be selected to provide a list of valid firing intervals. Select the correct firing interval for the engine being configured. • Number of Coils—Enter the total number of coils fired by the IC-920/-922. In some applications there are two coils per cylinder. If two coils are wired in parallel, each pair must be treated as one coil. The number of coils must be correct for the configured Firing Interval. • Strokes—Select “2” for 2-Stroke Cycle or “4” for 4-Stroke Cycle engines. Selection filters the Firing Interval choices. • Coils per Cylinder—Select “1” or “2” coils per cylinder. If two coils are wired in parallel, each pair must be treated as one coil. Selection filters the Firing Interval.
Woodward
37
IC-920/-922 Ignition Controller with ServLink •
Manual 26263
Firing Interval—Select the crank angle degrees between coil firing events. The first angle listed in the firing interval string is the crank angle degrees between the #1 output firing and the #2 output firing. The second firing angle listed in the string is the crank angle degrees between the #2 output firing and the #3 output firing, etc. Firing events continue and repeat at the configured firing intervals until the ignition is stopped. Use the engine manufacturers specifications to determine the correct Firing Intervals. The Firing Intervals must be correct for the number of coils programmed.
WARNING—OVERSPEED Always refer to the engine specification before entering data. Failure to enter proper engine data, (number of coils, firing intervals, number of teeth, etc.), could cause personal injury or equipment damage. Magnetic Pickup • Number of Teeth— Enter the number of teeth on the ring gear, pins or holes in the flywheel that the trigger MPU senses per one revolution of the engine crankshaft. Range: 60–500 • Reset Position—Enter the location of the reset MPU relative to TDC of cylinder #1 (output #1). This value is adjusted to precisely set ignition timing of the cylinder connected to the output #1. • Ignition will fire at speeds below 30 rpm with less than 200 teeth—Do not check except for very large engines that crank below 30 rpm and the number of teeth is less than 200. This allows ignition firing at very slow cranking speeds.
*—NOTE Minimum reset position is 10 degrees + most advanced timing of the engine. It may be necessary to set the MAX ADV A to a smaller number and then return to this page to set the reset position at the correct value.
38
Woodward
Manual 26263
IC-920/-922 Ignition Controller with ServLink
Timing Configuration Page •
•
•
Disable schedule selection through Contact B—Schedule A timing will be used exclusively when this box is checked. Uncheck this box to make Schedule B timing available. If unchecked, opening the contact B input selects schedule A timing and closing the contact B input to ground selects schedule B timing. Maximum Advance—Enter the maximum allowable advance, in degrees. This setting is independent and will override the combined effect of all timing variables (Pot A or B, 4–20 mA, 0-5 V and Speed Curve). Separate limits are provided for schedule A and schedule B. Maximum Retard—Enter the maximum allowable retard, in degrees. This setting is independent and will override the combined effect of all timing variables (Pot A or B, 4–20 mA, 0-5 V and Speed Curve). Separate limits are provided for schedule A and schedule B.
CAUTION—MAX ADV & MAX RET The MAX ADV and MAX RET need to be set for safe operation for the fuel type being used. This applies to both Schedules A and B. Manual Timing Range • Counterclockwise—Enter timing, in degrees, relative to TDC, when potentiometer is rotated fully CCW. Separate limits are provided for schedule A and schedule B potentiometers (Pot A and Pot B). • Clockwise—Enter timing, in degrees, relative to TDC, when potentiometer is rotated fully CW. Separate limits are provided for schedule A and schedule B potentiometers (Pot A and Pot B). Analog Input The analog input settings are used to choose an analog input source for controlling the ignition timing. Choose the analog input source by selecting the appropriate radio button. If no analog input will be used, select the No Analog Input button. Choosing an analog input radio button changes the settings that are displayed for the analog input. Only settings appropriate for the selected radio button are displayed. • No Analog Input—Select to ignore the analog input in any timing scheme. • Analog Input 4–20 mA—Select to use the 4–20 mA analog input signal in a timing scheme. Timing varies linearly between the 4 and 20 mA settings. • Analog Input 0–5 Vdc—Select to use the 0–5 Vdc analog input signal in a timing scheme. Timing varies linearly between the 0 and 5 Vdc settings. • Timing at 4 mA—This is the Timing OFFSET to be applied to the manual ignition timing setting of Pot A or Pot B (whichever is configured and selected) with 4 mA applied to the analog input. This is NOT an absolute timing setting. Enter the desired timing offset. • Timing at 20 mA—This is the Timing OFFSET to be applied to the manual ignition timing setting of Pot A or Pot B (whichever is configured and selected) with 20 mA applied to the analog input. This is NOT an absolute timing setting. Enter the desired timing offset. • Signal Loss Timing—This is the Timing OFFSET to be applied to the manual ignition timing setting of Pot A or Pot B (whichever is configured and selected) if the mA analog input is failed. This is NOT an absolute timing setting. Enter the desired timing offset. • Timing at 0 Vdc—This is the Timing OFFSET to be applied to the manual ignition timing setting of Pot A or Pot B (whichever is configured and selected) with 0 Vdc applied to the analog input OR if the Vdc analog input is failed. This is NOT an absolute timing setting. Enter the desired timing offset. Woodward
39
IC-920/-922 Ignition Controller with ServLink •
Manual 26263
Timing at 5 Vdc—This is the Timing OFFSET to be applied to the manual ignition timing setting of Pot A or Pot B (whichever is configured and selected) with 5 Vdc applied to the analog input. This is NOT an absolute timing setting. Enter the desired timing offset.
Include analog input in • Schedule A—Select to include the analog input as part of Schedule A timing scheme. The analog input offsets are combined (±) with other offsets. Do not select if this timing input is not needed for Schedule A. • Schedule B—Select to include the analog input as part of Schedule B timing scheme. The analog input offsets are combined (±) with other offsets. Do not select if this timing input is not needed for Schedule B. Speed Curve The speed curve table is used to enter timing offsets applied at different engine speed settings. A new speed curve setting is entered by double-clicking the next available cell in the Speed column of the table then typing the desired speed. Adjacent to the speed entry, enter the timing offset in the Timing column of the table. Select from the drop-down menu in the Units column whether the timing offset should advance or retard the timing. Speed curve settings must be entered in increasing speed order in the table. For instance, if a speed of 500 rpm already exists in the table, the next speed setting must be greater than or equal to 500 rpm. If a lower speed setting is desired, the higher speed setting must be removed from the table and re-entered after the lower speed setting is entered.
NOTE Speed point 1 rpm ≤ speed point 2 rpm ≤ speed point 3 etc.
To remove a speed curve breakpoint, delete the speed setting from the table. Speed curve breakpoints can only be deleted one at a time beginning with the last speed setting in the table. • Speed—Engine speed, in rpm, for each ignition timing breakpoint. Up to 5 breakpoints can be entered. Enter desired engine speeds in increasing order. • Timing—This is the Timing OFFSET, in crank angle degrees, to be applied to the manual ignition timing setting of Pot A or Pot B (whichever is configured and selected) for the adjacent speed setting. This is NOT an absolute timing setting. Enter the desired timing offset. • Units—Select either Advance or Retard for applying the timing offset setting. Include speed curve in • Schedule A—Select to include the speed curve as part of Schedule A timing scheme. The speed curve offsets are combined (±) with other offsets. Do not select if this timing input is not needed for Schedule A. 40
Woodward
Manual 26263 •
IC-920/-922 Ignition Controller with ServLink
Schedule B—Select to include the speed curve as part of Schedule B timing scheme. The speed curve offsets are combined (±) with other offsets. Do not select if this timing input is not needed for Schedule B.
Speed Configuration Page Speed Switch 1 The IC-920/-922 provides one speed switch, called Trip 1 for external use. The trip point is adjustable from 0 to 5000 rpm. The speed switch has a separately adjustable Hysteresis trip point, with a range from 0 to 5000 rpm. The switch changes states when engine speed exceeds the trip point, and the switch is reset when engine speed goes below the trip point minus the hysteresis value. If the hysteresis value is equal to or greater than the trip speed setting, the output is reset at 0 rpm. The switch action can be configured either Normally Open or Normally Closed. If the switch is configured normally open, the output will be open to ground below the trip point rpm and closed to ground above the trip point rpm. If the switch is configured normally closed, the output will be closed to ground below the trip point rpm and open to ground above the trip point rpm. The Trip1 status LED reflects this operation. At 0 rpm, the LED is on if configured normally closed and off if configured normally open. • Trip Point 1—Enter the rpm at which the Trip 1 output is activated. Can be set normally opened or normally closed. • Hysteresis 1—Enter desired amount of rpm below the speed switch Trip Point 1 rpm to reset the output. • Normally Open—Select to make output open to ground below the trip point. • Normally Closed—Select to make output closed to ground below the trip point. Woodward
41
IC-920/-922 Ignition Controller with ServLink
Manual 26263
Engine Control • Shutdown if maximum misfire rate is exceeded—Check to use a maximum misfire rate shutdown. • Maximum Misfire Rate—Enter the number of misfires per second that is permissible before the engine shuts down due to excessive misfire. Safety • Overspeed—Enter the rpm at which the ignition will shut down if exceeded. • Fuel Shutoff Threshold—This is essentially a programmable ‘Run’ speed setting that governs operation of the Contact A (Run/Stop) input. The fuel shutoff threshold also enables the Maximum Misfire Rate shutdown when checked for use. The Contact A (Run/Stop) enables or disables the primary outputs as follows: o Below the fuel shutoff threshold speed but above 30 rpm (approx.), the primary outputs will fire or stop firing each time the Run/Stop Contact is opened to ground (Run) or closed to ground (Stop). o Above the fuel shutoff threshold speed the primary outputs will stop firing when the Run/Stop Contact is closed to ground and will not fire again when the contact is opened until the engine has come to a full stop (zero rpm is sensed) and the engine is re-started. o Above the fuel shutoff threshold speed the primary outputs will fire if the Run/Stop Contact was closed to ground then opened for the first time. This allows engine starting when the fuel shutoff threshold speed is set below cranking speed. Typically the fuel shutoff threshold speed is set above cranking speed but below minimum or idle speed. Enter a suitable fuel shutoff threshold speed setting. Start Energy Start energy provides a means to set a higher energy level for engine starting. Once the engine starts and speed exceeds the start speed threshold, the energy level is switched to the manual energy level setting (usually a reduced level). • Speed Threshold—Enter the engine rpm to cut off the start Energy Level setting. Above the speed threshold, the start energy level is ignored and the manual energy level setting is in force. • Energy Level—Enter the Energy Level used during engine starting when engine rpm is below the Speed Threshold.
42
Woodward
Manual 26263
IC-920/-922 Ignition Controller with ServLink
CAN Configuration Page for Controls without J1939 CAN Write values through the CAN Port—Enabling CAN write values makes the hardware discrete and analog inputs inactive and enables CAN write capability. This should NOT be checked for simply monitoring the IC-920/-922 with a CANbus device (read only). This should only be checked to write values to the IC-920/-922 with a CANbus device (read/write) and ignore the discrete and analog inputs. CAN Identifier—Used for CAN communication. Must be set at 2 when used with the D-1 Display OR it must match the CAN master setting.
Woodward
43
IC-920/-922 Ignition Controller with ServLink
Manual 26263
CAN Configuration Page for Controls with J1939 CAN
J1939 CAN control enabled—If J1939 CAN control is selected, operation is with CAN control. There must be a master on the CANbus that sends the IC-92x timing and energy information. See Chapter 10 for J1939 CAN enabled. J1939 Diagnostic Priority—The Priority for the Diagnostic message may be set from 0-7. Priority 0 is the highest priority, 7 is the lowest.
44
Woodward
Manual 26263
IC-920/-922 Ignition Controller with ServLink
Modbus® Configuration Page for Controls with J1939 CAN
Modbus® * RTU Slave address—Default address is 2. Can be changed for compatibility. *—Modbus is a trademark of Modicon, Inc.
Modbus Mode Enable/Disable—Default Mode is Disabled. If you need to connect with Modbus protocol, Enable this. Modbus Write Enable/Disable —Default Mode is Disabled. If it is only desired to use a Modbus display for monitoring ignition status, this may be left at Disable. If any changes are made on the Modbus, this needs to be set to Enable.
Working with Configuration Files Saving a Configuration Once all configuration settings have been correctly entered the configuration can be saved to a file and loaded to the IC-920/-922 ignition control. Select File, Save to save the configuration to the existing filename or select File, Save As to save the configuration to a new filename.
Woodward
45
IC-920/-922 Ignition Controller with ServLink
Manual 26263
Use the browser to select a folder in which to save the configuration and enter an appropriate filename (e.g., Example.cfg).
Open and Edit a Saved Configuration File Any saved configuration file may be opened and edited without connecting the service tool to an IC-920/-922 ignition control. On the menu bar of the IC-900 Series Service Tool, select File, Open Configuration File.
46
Woodward
Manual 26263
IC-920/-922 Ignition Controller with ServLink
You will be prompted to open a saved configuration file. (e.g., Example.cfg). Use the browser to find, select and open the desired configuration file for editing.
The selected configuration file opens in the Configuration File Editor window. This configuration is now available in the IC-900 Series Service Tool for use ‘Asis’ to load into an IC-920/-922 ignition control or to edit before loading the configuration. If editing is necessary, select or enter the correct value or setting for each parameter listed on all 4 configuration screens. Select File, Save to save the edited configuration to the existing filename or select File, Save As to save the configuration to a new filename. Use the browser to select a folder in which to save the configuration and enter an appropriate filename.
Open and Edit the Existing Control Configuration This choice uploads the existing IC-920/-922 configuration into the IC-900 Series Service Tool. Once this file is made available in the IC-900 Series Service Tool, the configuration settings can be: • Saved to a file • Downloaded ‘As-is’ into another IC-920/-922 • Edited and saved to a file • Edited and downloaded into the existing IC-920/-922 • Edited and downloaded into another IC-920/-922. The IC-900 Series Service Tool must be in communication with the IC-920/-922 ignition control before the control configuration can be opened. The control configuration can be safely opened while the engine is running. However, configuration changes made in the IC-900 Series Service Tool do not take effect in the IC-920/-922 ignition control until the changes are loaded from the service tool into the control.
NOTE Configuration changes made in the IC-900 Series Service Tool cannot be loaded to the control while the engine is running.
Woodward
47
IC-920/-922 Ignition Controller with ServLink
Manual 26263
On the IC-900 Series Service Tool menu bar, select File, Open Control Configuration or click the Change Configuration button on the Configuration screen, then click the Open from Control icon.
The uploaded IC-920/-922 configuration opens in the Configuration File Editor window. If editing is necessary, select or enter the correct value or setting for all parameters listed on all four (4) configuration screens. Use File Save or File Save As to save the revised configuration.
Loading a Configuration File Configuration changes made in the IC-900 Series Service Tool do not take effect in the IC-920/-922 control until the configuration file is loaded into the control. To load a completed configuration into the IC-920/-922 control, the engine must be stopped and the IC-900 Series Service Tool, with the correct configuration file open, must be connected to the IC-920/-922 ignition control. Any of the following actions may be used to load an open configuration into the IC-920/-922 ignition control: • Click the Load To Control icon • Select File, Load To Control • Press Ctrl + L hot key
48
Woodward
Manual 26263
IC-920/-922 Ignition Controller with ServLink
You will be prompted for a password.
Enter the Password and select OK. The Password is hours + 10. The following screen appears while configuration settings are loading.
The following message appears when an attempt is made to load a configuration while the engine is running.
Once loading is completed, the new configuration settings take affect. Upon closing the Configuration File Editor screen, you will be prompted to save or not new or revised configuration settings to a file. This prompt does not appear if an already existing saved file was loaded.
Woodward
49
IC-920/-922 Ignition Controller with ServLink
Manual 26263
Select Yes to save the configuration to a file. Select No if you do not want to save the configuration to a file. When Yes is selected, the following Save window opens.
Browse to an appropriate folder and enter a new filename to create a New file or select an Existing filename to overwrite (e.g., Example.cfg) then click Save.
50
Woodward
Manual 26263
IC-920/-922 Ignition Controller with ServLink
Chapter 9. CANbus Information for Non J1939 Controls CAN Bus Interface with the D-1 Display There are two modes for the CANbus: READ ONLY and READ/WRITE. The WRITE mode is enabled with the IC-900 Series Service Tool by checking Write values through the CAN Port. If the IC-920/-922 is set to Write values through the CAN Port, it is possible to read and write values on the CANbus. When the CAN Bus is enabled, writing of all engine parameters is allowed. If the IC-920/-922 is not set to Write values through the CAN Port, it is only possible to read values on the CANbus.
Read/Write Mode When the IC-920/-922 is set to Write values through the CAN Port, the CANbus is set to read/write. It is possible to program the configuration data, individual cylinder timing, or energy level over CAN. In order to set any configuration data, the D-1 Display must first have the ignition RUN parameter set to disable. This allows configuration data to be changed/set to the desired values. It also signals the CPU to disable the primary outputs since the configuration might be changed. Once the entire configuration is correctly entered, set the D-1 Display RUN parameter to enable to save all changed configuration data to non-volatile memory. This also checks for errors between parameters dependent on each other such as, the number of cylinders and the firing intervals, reset position and most advanced timing limit, and the speed curve set points. If there are no errors, the RUN parameter is set to enable and the ignition will start firing as soon as valid MPU inputs are sensed. In this mode it is necessary to set the RUN parameter to enable before the outputs will fire. In order for the CAN Bus to function properly, the correct CAN ID must be used. This ID number is 2 with the D-1 display.
D-1 Display To make the number of cylinders displayed on the D-1 Display match the number of cylinders programmed on the IC-920/-922, refer to D-1 Manual 26143, section 4.1, Configuration of D-1. If you are already familiar with the D-1 configuration screens, select configure base? = NO, then config. Ignition controlling = YES. The next screen is number of cylinders. Set the number of cylinders to the same number configured in the IC-920/-922. This does not set the number of cylinders in the IC-920/-922, it just sets the D-1 display to match the number of cylinders programmed in the IC-920/-922.
Woodward
51
IC-920/-922 Ignition Controller with ServLink
Manual 26263
NOTE The D-1 Display has fewer parameters than the IC-900 Series Service Tool Configuration menu. Since the IC-900 Series Service Tool is needed to enable or disable the CAN bus, it is best to set all the IC-920/-922 Configuration parameters with the IC-900 Series Service Tool at that time.
NOTE The D-1 Display monitoring is limited to 16 coils. The D-1 Display is not suitable for monitoring engines with more than 16 coils.
CANbus Cable Connect the IC-920/-922 to the D-1 display as shown below.
Figure 9-1. CAN Bus cable connections for the D-1 Display
52
Woodward
Manual 26263
IC-920/-922 Ignition Controller with ServLink
Chapter 10. CANbus Information for J1939 Controls NOTE The D1 display is not compatible with J1939 CAN enabled IC-920 or IC-922 controls. The D1 is only for use with non-J1939 CANbus.
J1939 CAN Disabled On Controls with the J1939 CAN, there is a second status line that shows the CANbus status. If CAN is disabled, all that is shown is CAN disabled, and the service tool is the means for monitoring and adjusting the control. The Total Timing, Energy adjustment, and Individual timing are the same as previously described.
J1939 CAN Enabled When Enabling the CANbus with J1939, it is necessary to have a master that sends Timing and Energy information to the IC-92x. Since the IC-92x is being controlled, the only means of adjusting the Total Timing, Energy Levels, and Individual timing is with the CANbus. As the next two screens show, the “Edit Timing Offsets” and “Edit Energy Control” are not available with J1939 CAN enabled. There is no potentiometer, speed curve or analog input timing adjustment, and the timing of these is not displayed.
Woodward
53
IC-920/-922 Ignition Controller with ServLink
Manual 26263
J1939 CAN Bus Status As shown below, the J1939 CAN versions have a J1939 CAN Status line.
NOTE The “Edit Energy Control” is not available with J1939 CAN enabled. The J1939 CAN Status displays shows additional status information about the mode of the ignition based on the CANbus. The mode is displayed on the status line as: Waiting for Global timing and energy values The address claim message has not been sent because there is no other CAN bus nodes connected. The ignition will not fire. Waiting for Global timing and energy values—Active The address claim message has been sent and the ignition needs to receive a valid Global Timing and energy message. The ignition will not fire.
54
Woodward
Manual 26263
IC-920/-922 Ignition Controller with ServLink
Global timing and energy values received—Active A valid Global Timing and energy message has been received. Once the Global Timing and energy is received, the ignition will fire whenever the MPU signals are valid. Waiting for Global timing and energy values—Can’t claim address: Power has to be cycled to start CAN An address claim message was received with higher priority and the ignition will not receive or transmit on the CANbus. In order to try and reestablish CAN communication, the power must be cycled. The ignition will not fire because no valid Timing and Energy has been received. Global timing and energy values received—Can’t claim address: Power has to be cycled to start CAN The ignition will continue to fire if firing or will start firing if the MPU signals become valid. Since a valid timing and energy is received, the ignition will not shut-down and will start firing or continue firing with the timing and energy at the last received values. An address claim message was received with higher priority and the ignition will not receive or transmit on the CAN.
SAE J1939 CAN Communications with Woodward EGS-02 The IC-92x supports CAN communications in the SAE J1939 Higher Layer Protocol format. Further detailed information regarding the J1939 Standards Collection can be purchased at www.sae.org. Information about CAN is at www.semiconductors.bosch.de. Specific information regarding IC-92x behavior is detailed below. All IC-92x J1939 messages use the CAN 2.0B 29-bit Extended Data Frame Format. The CAN link can support 11 Bit and 29 Bit identifiers, compatible with the 2.0A and B standards. All controls on the CAN network must share the same battery minus connection between the controls. Supported Request PGNs If the engine control system needs any of the status information, it will use the request message below. Request Message Description Transmission repetition rate Data length Data page PDU format PDU specific Default priority Parameter Group Number
Byte: Byte: Byte:
Woodward
1 2 3
Value On request 3 bytes 0 234 Eah IC-92x address 6 x Eaxxh
requested data PGN lsb requested data PGN requested data PGN msb
55
IC-920/-922 Ignition Controller with ServLink
Manual 26263
Response Messages The message format is the same as in the J1939 specification (Vehicle Application Layer - J1939-71). Ignition Timing 6 Description Transmission repetition rate Data length Data page PDU format PDU specific Default priority Parameter Group Number
Byte:
1-2 3...6 7-8
Value On request 8 bytes 0 254 135 7 65159
FEh 87h FE87h
Desired Ignition Timing Reserved Actual Ignition Timing
Desired Ignition Timing—Global Timing Received from Commanded Global Timing and Energy PGN: 61,236. Data length: 8 bytes Resolution: 1/128 deg/bit, -200 deg offset Range: -200 to 301.99 degrees Actual Ignition Timing —Actual Global Timing the IC-92x is using: Will be different from desired if no Commanded Timing has been received or the last received Commanded timing was not within the timing range of the ignition. Data length: 8 bytes Resolution: 1/128 deg/bit, -200 deg offset Range: -200 to 301.99 degrees Operational Range: The IC-920 only allows operation between -60.00 and + 60.00 degrees. The Actual Ignition timing will be limited by the user programmable values for maximum and minimum timing. The Actual Ignition timing will be 0° and the Desired Global ignition Timing will be 308° until a valid Global timing is received (PGN 61236, 0xEF34). Type: Status Ignition Timing 1-5 Description Transmission repetition rate Data length Data page PDU format PDU specific Default priority Parameter Group Number
Byte:
1-2 3-4 5-6 7-8
Value On request 8 bytes 0 254 130-134 7 65154-65158
FEh 82h-86h FE87h
See Table See Table See Table See Table
Engine Cylinder #1 to #20 Ignition Timing—Actual Cylinder Timing IC-92x is using. Data length: 8 bytes Resolution: 1/128 deg/bit, -200 deg offset Range: -200 to 301.99 degrees Operational Range: The IC-920 only allows individual timing offsets between -10.00 and +3.00 degrees. Type: Status 56
Woodward
Manual 26263
IC-920/-922 Ignition Controller with ServLink
The message format is the same as in the J1939 specification (Vehicle Application Layer - J1939-71). Supported SAE J1939 PGNs as described in J1939-71 PGN 65159
65154
65155
65156
65157
65158
Start Position 1-2 3-4 5-6 7-8 1-2 3-4 5-6 7-8 1-2 3-4 5-6 7-8 1-2 3-4 5-6 7-8 1-2 3-4 5-6 7-8 1-2 3-4 5-6 7-8
Bit Size 16 16 16 16 16 16 16 16 16 16 16 16 16 16 16 16 16 16 16 16 16 16 16 16
Parameter Desired Global Ignition Timing (Reserved) (Reserved) Actual Ignition Timing Engine Cylinder # 1 Ignition Timing Engine Cylinder # 2 Ignition Timing Engine Cylinder # 3 Ignition Timing Engine Cylinder # 4 Ignition Timing Engine Cylinder # 5 Ignition Timing Engine Cylinder # 6 Ignition Timing Engine Cylinder # 7 Ignition Timing Engine Cylinder # 8 Ignition Timing Engine Cylinder # 9 Ignition Timing Engine Cylinder # 10 Ignition Timing Engine Cylinder # 11 Ignition Timing Engine Cylinder # 12 Ignition Timing Engine Cylinder # 13 Ignition Timing Engine Cylinder # 14 Ignition Timing Engine Cylinder # 15 Ignition Timing Engine Cylinder # 16 Ignition Timing Engine Cylinder # 17 Ignition Timing Engine Cylinder # 18 Ignition Timing Engine Cylinder # 19 Ignition Timing Engine Cylinder # 20 Ignition Timing
Engine Cylinder #21 to #24 Ignition Timing—Actual Cylinder Timing IC-92x is using. This is a proprietary PGN with the same format as PGNs 65154-65158. Description Transmission repetition rate Data length Data page PDU format PDU specific Default priority Parameter Group Number
Byte:
1-2 3-4 5-6 7-8
Value On request 8 bytes 0 255 244 7 65524
FFh F4h FFF4h
Engine Cylinder # 21 Ignition Timing Engine Cylinder # 22 Ignition Timing Engine Cylinder # 23 Ignition Timing Engine Cylinder # 24 Ignition Timing
Data length: 8 bytes Resolution: 1/128 deg/bit, -200 deg offset Range: -200 to 301.99 degrees Operational Range: The IC-920 only allows individual timing offsets between -10.00 and +3.00 degrees.
Woodward
57
IC-920/-922 Ignition Controller with ServLink
Manual 26263
IC-92x Diagnostics and Status—Actual Cylinder Timing IC-92x is using. PGN 65294 Transmission rate: 1 s or when there is a change in one of the status bits. This may be requested with a PGN request. Data length: 8 bytes Data page: 0 PDU format: 255 (0xFF) PDU specific: 14 (0x0E) Priority: 4, May be set from 0-7 in the Service tool. Data: Byte. Bit 1.1 1.2 1.3 1.4 1.5 1.6 1.7 1.8 2.1 2.2 2.3 2.4 2.5 2.6 2.7 2.8 3.1 3.2 3.3 3.4 3.5 3.6 3.7 3.8 4.1 4.2 4.3 4.4 4.5 4.6 4.7 4.8 5.1 5.2 5.3 5.4 5.5 5.6 5.7 5.8 6.1 6.2 6.3 6.4 6.5 6.6 6.7 6.8 7 8
Name Go/No Go Error Missing Ring Gear Signal Error Missing Reset Signal Error Missing Camshaft Signal Error Number of Gear Teeth Unknown Engine Application Code Over-speed Shutdown Reserved E2PROM Checksum Error Global Timing out of Range Unknown Global Timing or Energy Level Individual Timing out of Range Reserved Self-Test Shutdown Open Primary Rate Exceeded Wait for 0 RPM Open Primary, Channel 1 Open Primary, Channel 2 Open Primary, Channel 3 Open Primary, Channel 4 Open Primary, Channel 5 Open Primary, Channel 6 Open Primary, Channel 7 Open Primary, Channel 8 Open Primary, Channel 9 Open Primary, Channel 10 Open Primary, Channel 11 Open Primary, Channel 12 Open Primary, Channel 13 Open Primary, Channel 14 Open Primary, Channel 15 Open Primary, Channel 16 Open Primary, Channel 17 Open Primary, Channel 18 Open Primary, Channel 19 Open Primary, Channel 20 Open Primary, Channel 21 Open Primary, Channel 22 Open Primary, Channel 23 Open Primary, Channel 24 Warning Missing Ring Gear Signal Warning Missing Reset Signal Warning Missing Camshaft Signal Reserved SCR Fault Odd SCR Fault Even Odd Energy Level out of Range Even Energy Level out of Range Reserved Misfires /sec
58
Specification Data 1=Ignition Firing, 0=Not Firing Data 0=OK, 1=Fault Data 0=OK, 1=Fault Data 0=OK, 1=Fault Data 0=OK, 1=Fault Data 0=OK, 1=Fault Data 0=OK, 1=Fault Data 0 Data 0=OK, 1=Fault Data 0=OK, 1=Fault Data 0=OK, 1=Fault Data 0=OK, 1=Fault Data 0 Data 0=OK, 1=Fault Data 0=OK, 1=Fault Data 0=OK, 1=Fault Data 0=OK, 1=Fault Data 0=OK, 1=Fault Data 0=OK, 1=Fault Data 0=OK, 1=Fault Data 0=OK, 1=Fault Data 0=OK, 1=Fault Data 0=OK, 1=Fault Data 0=OK, 1=Fault Data 0=OK, 1=Fault Data 0=OK, 1=Fault Data 0=OK, 1=Fault Data 0=OK, 1=Fault Data 0=OK, 1=Fault Data 0=OK, 1=Fault Data 0=OK, 1=Fault Data 0=OK, 1=Fault Data 0=OK, 1=Fault Data 0=OK, 1=Fault Data 0=OK, 1=Fault Data 0=OK, 1=Fault Data 0=OK, 1=Fault Data 0=OK, 1=Fault Data 0=OK, 1=Fault Data 0=OK, 1=Fault Data 0=OK, 1=Fault Data 0=OK, 1=Fault Data 0=OK, 1=Fault Data 0 Data 0=OK, 1=Fault Data 0=OK, 1=Fault Data 0=OK, 1=Fault Data 0=OK, 1=Fault Data 0 Data 0-255
Alarm or Shutdown N/A Shutdown Shutdown Shutdown Alarm * Shutdown Shutdown Reserved Shutdown Alarm Shutdown * Alarm Reserved Shutdown Shutdown Alarm * Alarm Alarm Alarm Alarm Alarm Alarm Alarm Alarm Alarm Alarm Alarm Alarm Alarm Alarm Alarm Alarm Alarm Alarm Alarm Alarm Alarm Alarm Alarm Alarm Alarm * Alarm * Alarm * Reserved Shutdown Shutdown Alarm Alarm Reserved Status
Woodward
Manual 26263
IC-920/-922 Ignition Controller with ServLink
Alarm or Shutdown Column: A '*' indicates a special case as explained. Alarm is used to indicate the ignition will fire with this bit=1, except for bits 1.5, 2.8 and 6.1-6.3. The ignition will not fire when these bits=1, but any of these bits may be set as the engine starts and stops, or as the MPU signals become valid. These bits can only active if the engine is rotating, so they are called Alarms. A Shutdown indicates the ignition either was firing and shutdown due to a fault, or had a fault and is now in a "latched" shutdown mode. Firing will not be allowed and the power must be cycled to clear the fault. Bit 2.3 is the exception to this. It is equal to 1 until a valid Global Timing and energy is received.
Detailed Information about the Diagnostic Bits 1.1 Go/No Go This indicates if the ignition is firing or not. It is the same as Contact A. 1.2 to 1.4 Ring Gear, Reset, and Cam Errors These indicate the ignition shut down with the indicated MPU error. The power must be cycled to clear this error. 1.5 Error Number of Gear Teeth This indicates that the sensed number of teeth is different than what is programmed. Only active/possible if there is a signal from the ring gear. 1.7 Over-speed Shutdown This indicates the ignition shut down because the speed was greater than the over-speed. The power must be cycled to clear this error. 2.2 Global Timing out of Range This indicates the Global timing received was outside the max/min allowed timing. The actual timing will be set to the maximum advance or maximum retard and this bit will stay set until a timing is received that is within the limits. PGN 65159 will reflect the Global Timing that is out of range with the Desired Global Ignition Timing and the actual timing that is either the max or min timing allowed with the Actual Ignition Timing. 2.3 Unknown Global Timing or Energy Level This bit is set after the IC-920 sends an address claimed message until a valid Global Timing, Odd and Even energy level are received with PGN 61236 - Global Timing and Energy Level. 2.4 Individual Timing out of Range The Individual Timing out of Range is set if at least one of the eight values received is out of range. It is cleared when one of the Individual cylinders is in range and none are out of range. If an Individual timing PGN has all eight bytes equal to 255, the status of the Diagnostic bit is unchanged. Any Individual timing that is out of range will not be written and the last valid value received is used. 2.6 Self-Test Shutdown This indicates the ignition shut down because engine rotation was sensed during Self-Test. The power must be cycled to clear this error. It is only possible to put the ignition in self-test mode with the service tool. If the CAN bus is active, this error will be reported. 2.7 Open Primary Rate Exceeded This indicates the ignition shut down because Misfire rate was equal or greater than the user programmed value for maximum misfire rate. The ignition can only detect if there was an open in the primary circuit of the ignition coil. It cannot detect any other misfire. The power must be cycled to clear this error. 2.8 Wait for 0 RPM This indicates rotation is being sensed and the ignition will not fire until the rpm is zero. 3.1 - 5.8 Open Primary, Channel 1-24 This indicates there an open in the primary circuit. Woodward
59
IC-920/-922 Ignition Controller with ServLink
Manual 26263
6.1 to 6.3 Ring Gear, Reset, and Cam Warnings These indicate a faulty or missing MPU signal. This is warning and will be cleared if the signal becomes valid, zero rpm, or there is no signal on 2 of the 3 MPUs. 6.5 to 6.6 Odd or Even Bank SCR Fault This indicates the ignition shut down because of an SCR fault. The power must be cycled to clear this error. 6.7 Odd Energy Level out of Range This is set if the Odd Energy is less than 10 or greater than 100. It is cleared when a valid energy level is received. There is no message that indicates the status of the energy level, so if this bit is 0 after a PGN 61236 is sent, the ignition accepted the energy level. 6.8 Even Energy Level out of Range This is set if the Even Energy is less than 10 or greater than 100. It is cleared when a valid energy level is received. There is no message that indicates the status of the energy level, so if this bit is 0 after a PGN 61236 is sent, the ignition accepted the energy level. 8 Misfires/sec The number of Misfires/sec. Misfire is an open in the primary circuit.
Proprietary PGNs (read from others) These proprietary PGNs allow Global and Individual Timing changes to be made to the IC-920. PGN # 61236 (0xEF34) 65525 (0xFFF5) 65526 (0xFFF6) 65527 (0xFFF7)
Description IC92x Global Timing & Energy Individual Timing Cyl 1-8 Individual Timing Cyl 9-16 Individual Timing Cyl 17-24
Table 10-1. IC-920 Proprietary Receive PGNs PGN 61236 – IC-92x Global Timing & Energy The IC-920 requires reception of this message before the ignition will fire. The received message must have a Global Timing value that is within the maximum and minimum range and both energy levels between 10–100. Until this message is received, with valid Timing and Energy values, the Global timing is 0° and the Diagnostic message has the Unknown Global timing and energy bit set to 1. The energy levels are set to whatever is in the EEPROM, The energy levels can only bet set with this message, there is no message to “read” the energy levels. Expected reception rate: Greater than 60 ms. Fastest allowed reception rate: 20 ms. The Global Timing can only be updated once every engine cycle so any update rate faster than the one engine cycle time just increases bus traffic. The IC-920 checks for this message every 10 ms. Application Range: The IC-920 limits the range of the Global timing from –60.00 to +60.00 degrees. The maximum and minimum timing range is user programmable and is generally limited to a much smaller range than ±60.00. Data length: 8 bytes Data page: 0 PDU format: 239 PDU specific: 52 Priority:5
60
Woodward
Manual 26263
IC-920/-922 Ignition Controller with ServLink
Data Format: Byte/Bit 1-2
Name IC-92x Global Timing
3
Odd Energy
4
Even Energy
5 6 7 8
Reserved Reserved Reserved Reserved
Specification Data length Resolution Range Application Range Data length Resolution Range Data length Resolution Range Data Data Data Data
2 bytes 1/128 deg/bit, -200 offset -200 to 301.99 deg -60.00 to 60.00 deg 1 byte 1%/bit, 0 offset 10 to 100 1 byte 1%/bit, 0 offset 10 to 100 0xFF (not supported) 0xFF (not supported) 0xFF (not supported) 0xFF (not supported)
Individual Timing Cylinders 1-8 Expected reception rate: Greater than 45 ms. Fastest allowed reception rate: 5 ms. The Individual Timing is only updated once every engine cycle. A 45 ms update rate for each of the three Individual timing messages allows all cylinders to be adjusted every engine cycle. The IC-920 polls this message generally several times a millisecond, but other tasks and interrupts can cause delays of up to 5ms. Data length: 8 bytes Data page: 0 PDU format: 255 PDU specific: 245 PGN: Parameter Group Number: 65525 (0xFFF5) Priority: 6 Resolution: .1 deg/bit, –125 offset Range: –10.0 to 3.0 degrees. The value 255 is valid also. Any cylinder with 255 is ignored: There is no change to the Individual cylinder timing. The offset allows for a greater range than is accepted by the IC-920. This range may be reduced more by the Global timing and the Max/Min timing. If the Max timing is set to 35 degrees and the Global Timing is set to 35 degrees, it is not possible to advance the individual cylinders. If the Global Timing is set to 15 degrees and the Maximum retard is 10 degrees (BTDC), the maximum individual cylinder retard is 5 degrees. Data: Byte/Bit 1 2 3 4 5 6 7 8
Name # 1 Individual Cylinder Timing # 2 Individual Cylinder Timing # 3 Individual Cylinder Timing # 4 Individual Cylinder Timing # 5 Individual Cylinder Timing # 6 Individual Cylinder Timing # 7 Individual Cylinder Timing # 8 Individual Cylinder Timing
Individual Timing Cylinders 9-16 Expected reception rate: Greater than 45ms. Fastest allowed reception rate: 5ms. The Individual Timing is only updated once every engine cycle. A 45ms update rate for each of the three Individual timing messages allows all cylinders to be adjusted every engine cycle. The IC-920 polls this message generally several times a millisecond, but other tasks and interrupts can cause delays of up to 5ms. Data length: 8 bytes Data page: 0 PDU format: 255 PDU specific: 246 Woodward
61
IC-920/-922 Ignition Controller with ServLink
Manual 26263
PGN: Parameter Group Number: 65526 (0xFFF6) Priority: 6 Resolution: .1 deg/bit, -125 offset Range: -10.0 to 3.0 degrees. The value 255 is valid also. Any cylinder with 255 is ignored: There is no change to the Individual cylinder timing. The offset allows for a greater range than is accepted by the IC-920. This range may be reduced more by the Global timing and the Max/Min timing. If the Max timing is set to 35 degrees and the Global Timing is set to 35 degrees, it is not possible to advance the individual cylinders. If the Global Timing is set to 15 degrees and the Maximum retard is 10 degrees (BTDC), the maximum individual cylinder retard is 5 degrees. Data: Byte/Bit 1 2 3 4 5 6 7 8
Name # 9 Individual Cylinder Timing # 10 Individual Cylinder Timing # 11 Individual Cylinder Timing # 12 Individual Cylinder Timing # 13 Individual Cylinder Timing # 14 Individual Cylinder Timing # 15 Individual Cylinder Timing # 16 Individual Cylinder Timing
Individual Timing Cylinders 17-24 Expected reception rate: Greater than 45ms. Fastest allowed reception rate: 5ms. The Individual Timing is only updated once every engine cycle. A 45ms update rate for each of the three Individual timing messages allows all cylinders to be adjusted every engine cycle. The IC-920 polls this message generally several times a millisecond, but other tasks and interrupts can cause delays of up to 5ms. Data length: 8 bytes Data page: 0 PDU format: 255 PDU specific: 247 PGN: Parameter Group Number: 65527 (0xFFF7) Priority: 6 Resolution: .1 deg/bit, -125 offset Range: -10.0 to 3.0 degrees. The value 255 is valid also. Any cylinder with 255 is ignored: There is no change to the Individual cylinder timing. The offset allows for a greater range than is accepted by the IC-920. This range may be reduced more by the Global timing and the Max/Min timing. If the Max timing is set to 35 degrees and the Global Timing is set to 35 degrees, it is not possible to advance the individual cylinders. If the Global Timing is set to 15 degrees and the Maximum retard is 10 degrees (BTDC), the maximum individual cylinder retard is 5 degrees. Data: Byte/Bit 1 2 3 4 5 6 7 8
62
Name # 17 Individual Cylinder Timing # 18 Individual Cylinder Timing # 19 Individual Cylinder Timing # 20 Individual Cylinder Timing # 21 Individual Cylinder Timing # 22 Individual Cylinder Timing # 23 Individual Cylinder Timing # 24 Individual Cylinder Timing
Woodward
Manual 26263
IC-920/-922 Ignition Controller with ServLink
Chapter 11. Start-up Procedure I. Before applying power to the IC-920/-922, check and verify the following: 1. Fuel valve is shut off. 2. The firing interval (sequence) is correct for the engine type. If you are not sure, contact your engine manufacturer. 3. The cylinder firing order is known and the ignition coils are wired in accordance with the MS Output Receptacle Wiring Diagram, Figure 1-5. 4. All timing sensors are properly gapped and tightened. 5. All timing sensors are wired in accordance with Figure 1-4. 6. Spark plugs are clean, gapped and torqued correctly. 7. Secondary leads are tightly secured at the coils and spark plugs and that there is adequate separation between the leads and engine surfaces.
II. Apply power to the IC-920/-922 (Fuel valve remains in the off position): 1. Check and verify that the IC-920/-922 is programmed correctly (see Chapter 8). 2. Verify the contact A input and/or the Run/Stop signal (CAN) are functioning properly. 3. If applicable, verify the contact B input or Schedule B signal (CAN) is functioning properly and verify the correct Schedule (A or B) is selected for starting. 4. Purge the engine to be sure that there is no fuel present in the intake and exhaust systems before the ignition is turned ON. 5. Perform the normal engine start-up procedure (prelube, etc.), except that the fuel must remain OFF (crank and ignition only). DO NOT START THE ENGINE. 6. With a timing light connected to the #1 cylinder, verify that the cylinder is firing within ±2 degrees of the programmed setting. If not, verify the wiring is connected correctly and that the reset BTDC program position is correct. Refer to Chapter 12, Troubleshooting, for additional guidance. 7. Check all remaining cylinders for proper timing. If not correct within ±2 degrees, stop the engine and recheck wiring and firing interval (sequence) for correctness. 8. If applicable, select the alternate timing schedule with the contact B input or Schedule B signal (CAN) and repeat steps 5 & 6. Woodward
63
IC-920/-922 Ignition Controller with ServLink
Manual 26263
9. Disengage the starter. If no problems are encountered, continue with step III. Otherwise make necessary corrections before proceeding.
III. Set the fuel valve to its normal position and start the engine: 1. If the engine fails to start, refer to Chapter 12, Troubleshooting. 2. When the engine starts, verify ignition timing of #1 cylinder with a timing light. Adjust Pot A or Pot B (whichever is selected) as needed, to precisely set the timing of the #1 cylinder firing at the correct crank angle. 3. Increase engine speed to the normal operating speed. 4. Check timing of #1 cylinder again and compare measured timing to the total timing displayed on the IC-900 Series Service Tool. 5. If the IC-900 Series Service Tool is measuring ignition timing too high, the reset BTDC program position needs to be reduced by the difference. Example: If the IC-900 Series Service Tool displays 22.0 Adv. and the timing light measured timing is 20.5 Adv., the reset position will have to be reduced by 1.5 degrees (22–20.5). If the reset program position is 50 Adv., the reset position will have to be changed to 48.5 degrees (50-1.5). 6. If the IC-900 Series Service Tool is measuring ignition timing too low, the reset BTDC program position will have to be increased by the difference. 7. If the reset BTDC program position must be changed, shut down the engine using the normal shutdown procedure and make the necessary reset BTDC program position changes (see Chapter 8). 8. Re-start the engine and verify that the #1 cylinder is firing at the correct crank angle and that the displayed total timing matches the timing light timing. 9. Check all remaining cylinders for proper timing. If not correct, stop the engine and recheck wiring and sequence number for correctness. Minor variations (±0.5°) can be eliminated without shutting down the engine, if needed, by adjusting the individual cylinder timing. 10. If all cylinders are operating properly, gradually apply full load to the engine. 11. Verify that all cylinders continue operating properly. If not refer to Chapter 12, Troubleshooting. 12. If possible, verify that all cylinders are carrying their share of the total engine load (e.g., by peak firing pressure, exhaust temp, etc.). Recommend load balancing to the operator if load is not shared equally. 13. Installation is complete.
14. Save the final configuration settings on IC-920/-922 Configuration to a file and keep these settings in a secure location for future reference.
64
Woodward
Manual 26263
IC-920/-922 Ignition Controller with ServLink
Chapter 12. Troubleshooting Sensor Input Faults Sensor fault messages are displayed in the Ignition Status message on the IC-900 Series Service Tool. Fault messages are also displayed on the optional D-1 Display. •
TRIGGER MPU—The IC-920/-922 measures the number of teeth/events between two successive reset MPU signals. If the IC-920/-922 detects that the programmed number of teeth do not match the measured number of teeth, an error will be detected. Two type of faults exist: 1. WRONG NUMBER OF TEETH PROGRAMMED—This error occurs if the IC-920/-922 never detects the correct number of programmed teeth. Corrective action: 1) Verify tooth count and program in correct number of teeth. 2) Inspect flywheel/ring gear for gouges or other deformities that might generate a signal from the trigger MPU or reset MPU. The number of teeth detected is displayed at the end of the fault message. 2. “Trigger/tooth count error” or “Trigger error: The Trigger MPU was lost or the tooth count was incorrect by more than 3 teeth”—Once the engine is running (rpm greater than 200) and an erroneous tooth count is detected, a missing ring gear message appears. Corrective action: Inspect flywheel/ring gear for a broken tooth, gouges, or other deformities that might generate a signal from the trigger or reset MPU. A gear count number accompanies this error to indicate where the problem is detected. If it is consistently the same number for two or three times, the problem is that many teeth from the reset pin location.
•
RESET MPU—The IC-920/-922 measures the number of events between two successive cam signals. If the IC-920/-922 detects that the number of events does not match the expected number of events, a reset error is detected.
•
CAM MPU (4 cycle only)—The IC-920/-922 measures the number of events between three successive reset MPU signals. If the IC-920/-922 detects that the number of events does not match the expected number of events, a cam error is detected.
•
MPU Warnings—The IC-920/-922 will display an MPU warning if one of the three MPUs is not correct. This will occur if the MPU fault occurs at less then 200 rpm, or if an MPU fault occurs when the ignition is not firing.
SCR Faults The IC-920/-922 monitors each firing event. An SCR fault shutdown occurs when an unexpected firing event is detected and is immediately followed by a low capacitor voltage and a coil misfire. The low capacitor voltage and coil misfire verify an unexpected firing event actually occurred. Corrective action: Return the IC-920/-922 ignition unit for repair. Woodward
65
IC-920/-922 Ignition Controller with ServLink
Manual 26263
Ignition Coil Faults If an ignition coil problem is suspected, the IC-920/-922 provides two means of detecting the problem: • Primary Misfire Detection • Self-Test Feature
Self Test The self-test feature of the IC-920/-922 allows the installer, operator or mechanic to conduct performance checks on the primary wiring to the coil, the ignition coil, high tension leads, and spark plugs by discharging the energy stored in the high voltage capacitor into each coil in successive order. The IC-920/-922 will “fire” a primary output every 0.1 second. The energy delivered to each coil is determined by the manual energy level setting. The engine must be stopped and a valid password must be entered before Self Test operation is allowed. To run the self-test feature of the IC-920/-922, select Tools, Start Self-Test from the service tool menu bar.
The IC 900 Series Service Tool displays a step-by-step Self Test wizard. First you will be prompted to enter a password.
66
Woodward
Manual 26263
IC-920/-922 Ignition Controller with ServLink
After the correct password is entered, you will be prompted to verify the engine is purged. Be sure the fuel is shut-off and the engine is purged of any raw fuel.
WARNING—SHUT OFF/PURGE FUEL In using the self-test feature of the IC-920/-922, it is critical that the fuel to the engine be shut off and the engine purged of any fuel gas before starting the self-test. Failure to do this could result in personal injury or damage to equipment. After the engine is purged check the box then ‘Next”. Self-test will begin to sequentially fire each output at 0.1 second intervals and will continue until the STOP icon is clicked or the Alt + S hot key is pressed. Cycling power also stops self-test. The following message is displayed if power to the IC-920/-922 ignition module is interrupted or if communication is lost during self-test. It is important to be prepared to interrupt power should communications be lost since the service tool cannot stop self-test without an operating communications link.
Woodward
67
IC-920/-922 Ignition Controller with ServLink
Manual 26263
WARNING—POWER OFF Power to the IC-920/-922 must be interrupted to stop self-test if the communications link between the IC-920/-922 and the IC-900 Series Service Tool is lost. Make any necessary preparations for this. Click the STOP icon or press the Alt + S hot keys to stop Self Test operation.
68
Woodward
Manual 26263
IC-920/-922 Ignition Controller with ServLink
Chapter 13. Service Options Product Service Options The following factory options are available for servicing Woodward equipment, based on the standard Woodward Product and Service Warranty (5-01-1205) that is in effect at the time the product is purchased from Woodward or the service is performed: • Replacement/Exchange (24-hour service) • Flat Rate Repair • Flat Rate Remanufacture If you are experiencing problems with installation or unsatisfactory performance of an installed system, the following options are available: • Consult the troubleshooting guide in the manual. • Contact Woodward technical assistance (see “How to Contact Woodward” later in this chapter) and discuss your problem. In most cases, your problem can be resolved over the phone. If not, you can select which course of action you wish to pursue based on the available services listed in this section.
Replacement/Exchange Replacement/Exchange is a premium program designed for the user who is in need of immediate service. It allows you to request and receive a like-new replacement unit in minimum time (usually within 24 hours of the request), providing a suitable unit is available at the time of the request, thereby minimizing costly downtime. This is also a flat rate structured program and includes the full standard Woodward product warranty (Woodward Product and Service Warranty 5-01-1205). This option allows you to call in the event of an unexpected outage, or in advance of a scheduled outage, to request a replacement control unit. If the unit is available at the time of the call, it can usually be shipped out within 24 hours. You replace your field control unit with the like-new replacement and return the field unit to the Woodward facility as explained below (see “Returning Equipment for Repair” later in this chapter). Charges for the Replacement/Exchange service are based on a flat rate plus shipping expenses. You are invoiced the flat rate replacement/exchange charge plus a core charge at the time the replacement unit is shipped. If the core (field unit) is returned to Woodward within 60 days, Woodward will issue a credit for the core charge. [The core charge is the average difference between the flat rate replacement/exchange charge and the current list price of a new unit.] Return Shipment Authorization Label. To ensure prompt receipt of the core, and avoid additional charges, the package must be properly marked. A return authorization label is included with every Replacement/Exchange unit that leaves Woodward. The core should be repackaged and the return authorization label affixed to the outside of the package. Without the authorization label, receipt of the returned core could be delayed and cause additional charges to be applied.
Woodward
69
IC-920/-922 Ignition Controller with ServLink
Manual 26263
Flat Rate Repair Flat Rate Repair is available for the majority of standard products in the field. This program offers you repair service for your products with the advantage of knowing in advance what the cost will be. All repair work carries the standard Woodward service warranty (Woodward Product and Service Warranty 5-01-1205) on replaced parts and labor.
Flat Rate Remanufacture Flat Rate Remanufacture is very similar to the Flat Rate Repair option with the exception that the unit will be returned to you in “like-new” condition and carry with it the full standard Woodward product warranty (Woodward Product and Service Warranty 5-01-1205). This option is applicable to mechanical products only.
Returning Equipment for Repair If a control (or any part of an electronic control) is to be returned to Woodward for repair, please contact Woodward in advance to obtain a Return Authorization Number. When shipping the item(s), attach a tag with the following information: • name and location where the control is installed; • name and phone number of contact person; • complete Woodward part number(s) and serial number(s); • description of the problem; • instructions describing the desired type of repair.
CAUTION—ELECTROSTATIC DISCHARGE To prevent damage to electronic components caused by improper handling, read and observe the precautions in Woodward manual 82715, Guide for Handling and Protection of Electronic Controls, Printed Circuit Boards, and Modules.
Packing a Control Use the following materials when returning a complete control: • protective caps on any connectors; • antistatic protective bags on all electronic modules; • packing materials that will not damage the surface of the unit; • at least 100 mm (4 inches) of tightly packed, industry-approved packing material; • a packing carton with double walls; • a strong tape around the outside of the carton for increased strength.
70
Woodward
Manual 26263
IC-920/-922 Ignition Controller with ServLink
Return Authorization Number When returning equipment to Woodward, please telephone and ask for the Customer Service Department [1 (800) 523-2831 in North America or +1 (970) 482-5811]. They will help expedite the processing of your order through our distributors or local service facility. To expedite the repair process, contact Woodward in advance to obtain a Return Authorization Number, and arrange for issue of a purchase order for the item(s) to be repaired. No work can be started until a purchase order is received.
NOTE We highly recommend that you make arrangement in advance for return shipments. Contact a Woodward customer service representative at 1 (800) 523-2831 in North America or +1 (970) 482-5811 for instructions and for a Return Authorization Number.
Replacement Parts When ordering replacement parts for controls, include the following information: • the part number(s) (XXXX-XXXX) that is on the enclosure nameplate; • the unit serial number, which is also on the nameplate.
How to Contact Woodward In North America use the following address when shipping or corresponding: Woodward Governor Company PO Box 1519 1000 East Drake Rd Fort Collins CO 80522-1519, USA Telephone—+1 (970) 482-5811 (24 hours a day) Toll-free Phone (in North America)—1 (800) 523-2831 Fax—+1 (970) 498-3058 For assistance outside North America, call one of the following international Woodward facilities to obtain the address and phone number of the facility nearest your location where you will be able to get information and service. Facility Brazil India Japan The Netherlands
Phone Number +55 (19) 3708 4800 +91 (129) 230 7111 +81 (476) 93-4661 +31 (23) 5661111
You can also contact the Woodward Customer Service Department or consult our worldwide directory on Woodward’s website (www.woodward.com) for the name of your nearest Woodward distributor or service facility.
Woodward
71
IC-920/-922 Ignition Controller with ServLink
Manual 26263
Engineering Services Woodward Industrial Controls Engineering Services offers the following aftersales support for Woodward products. For these services, you can contact us by telephone, by email, or through the Woodward website. • • •
Technical Support Product Training Field Service
Contact information: Telephone—+1 (970) 482-5811 Toll-free Phone (in North America)—1 (800) 523-2831 Email—[email protected] Website—www.woodward.com Technical Support is available through our many worldwide locations or our authorized distributors, depending upon the product. This service can assist you with technical questions or problem solving during normal business hours. Emergency assistance is also available during non-business hours by phoning our toll-free number and stating the urgency of your problem. For technical support, please contact us via telephone, email us, or use our website and reference Customer Services and then Technical Support. Product Training is available at many of our worldwide locations (standard classes). We also offer customized classes, which can be tailored to your needs and can be held at one of our locations or at your site. This training, conducted by experienced personnel, will assure that you will be able to maintain system reliability and availability. For information concerning training, please contact us via telephone, email us, or use our website and reference Customer Services and then Product Training. Field Service engineering on-site support is available, depending on the product and location, from one of our many worldwide locations or from one of our authorized distributors. The field engineers are experienced both on Woodward products as well as on much of the non-Woodward equipment with which our products interface. For field service engineering assistance, please contact us via telephone, email us, or use our website and reference Customer Services and then Technical Support.
72
Woodward
Manual 26263
IC-920/-922 Ignition Controller with ServLink
Technical Assistance If you need to telephone for technical assistance, you will need to provide the following information. Please write it down here before phoning:
General Your Name Site Location Phone Number Fax Number
Prime Mover Information Engine/Turbine Model Number Manufacturer Number of Cylinders (if applicable) Type of Fuel (gas, gaseous, steam, etc) Rating Application
Control/Governor Information Please list all Woodward governors, actuators, and electronic controls in your system:
Woodward Part Number and Revision Letter Control Description or Governor Type Serial Number Woodward Part Number and Revision Letter Control Description or Governor Type Serial Number Woodward Part Number and Revision Letter Control Description or Governor Type Serial Number If you have an electronic or programmable control, please have the adjustment setting positions or the menu settings written down and with you at the time of the call.
Woodward
73
IC-920/-922 Ignition Controller with ServLink
Manual 26263
Appendix A. Reference Information LED Operation Eight LEDs are visible inside the IC-920/-922 enclosure. Their operation is as follows: Power LED The illumination of this LED indicates the input power is properly connected. Permissive Start LED This LED indicates whether the ignition primary outputs are active. If the LED is illuminated, the ignition is firing and the primary ignition coil outputs are active (firing). The Permissive Start LED mimics the state of the Permissive Start Output state. If the LED is illuminated, the Permissive Start Output contact is closed/connected to ground on the ignition. If the LED is off, the Permissive Start Output contact is not connected to ground and the ignition is not firing the primary outputs. See the Permissive Start Output section in Chapter 6 for a detailed description of the Permissive Start Output. System LED This is an IC-920/-922 CPU status LED and is not associated with any contact pin. 1 short flash per second indicates either “Ready” mode without CAN communication OR CAN Communication is on and the ignition is firing with valid MPU inputs. Ready mode is: MPUs are not active, the ignition is not firing, there are no errors or warnings, and the configuration programming screen/mode is not active. 2 short flashes indicate the ready mode with the CAN communication active. Always on: The System LED is always on if the configuration menu is enabled or if there is an error or warning. If CAN communication is active, it will cause a flicker once per second. Always off: The ignition is firing and the CAN communication is not active. Trip 1 LED An illuminated Trip 1 LED indicates that the Trip 1 Output contact is in the closed state. When the LED is off, the Trip 1 Output contact is open. See the Speed Switch section in Chapter 6 for a detailed description of the Trip 1 Output contact. Trip 2 LED Alarm Output. Cam LED The Cam LED illuminates every time the Cam Timing Sensor Input goes high. See Chapter 2 for detailed description of the Cam Timing Sensor Input. 74
Woodward
Manual 26263
IC-920/-922 Ignition Controller with ServLink
Reset LED The Reset LED illuminates every time the Reset Timing Sensor Input goes high. See Chapter 2 for detailed description of the Reset Timing Sensor Input. Trigger LED The Trigger LED illuminates every time the Trigger Timing Sensor Input goes high. At high frequency, this LED may appear continuously illuminated. See Chapter 2 for detailed description of the Trigger Timing Sensor Input.
Woodward
75
IC-920/-922 Ignition Controller with ServLink
Manual 26263
Appendix B. Definitions and Programming Parameters Monitor Ignition Status—Displays a text message of the current status including faults. Engine Speed—Displays current speed in rpm. Total Timing—Displays overall ignition timing with all offsets applied. Engine Run Time—Displays cumulative running hours of the ignition control. Average Energy—Displays the average energy level of all outputs as a % of the maximum energy capability. Contact A—Displays condition of the Contact A input as opened (Run) or closed (Stop).
Engine Number of Coils—Actual number of coils fired by the IC-920/-922. In some applications there are two coils per cylinder. If two coils are wired in parallel, each pair must be treated as one coil. The number of coils must be correct for the configured Firing Interval. Strokes—“2” is for 2-Stroke Cycle and “4” is for 4-Stroke Cycle engines. Selection filters the Firing Interval choices to display only valid intervals. Coils per Cylinder—“1” or “2” coils per cylinder. If two coils are wired in parallel, each pair must be treated as one coil. Selection filters the Firing Interval choices to display only valid intervals Firing Interval—The crank angle degrees between coil firing events. The first angle listed in the firing interval string is the crank angle degrees between the #1 output firing and the #2 output firing. The second firing angle listed in the string is the crank angle degrees between the #2 output firing and the #3 output firing, etc. Firing events continue and repeat at the configured firing intervals until the ignition is stopped. Use the engine manufacturers specifications to determine the correct Firing Intervals. The Firing Intervals must be correct for the number of coils programmed. Number of Teeth— Number of teeth in the ring gear, pins or holes in the flywheel that the trigger MPU senses per one revolution of the engine. Range: 60–500. Reset Position—The location of the reset MPU relative to TDC of cylinder #1 (output #1). This value is adjusted to precisely set ignition timing of the cylinder connected to output #1.
Timing Disable schedule selection through Contact B—Schedule A timing will be used exclusively when this box is checked. Uncheck this box to make Schedule B timing available. If unchecked, opening the contact B input selects schedule A timing and closing the contact B input to ground selects schedule B timing. Maximum Advance—The maximum allowable advance, in degrees, independent of the combined effect of all timing variables (Pot A, 4–20 mA, 0-5 V and Speed Curve). Limits for schedule A and schedule B are separate. Maximum Retard—The maximum allowable retard, in degrees, independent of the combined effect of all timing variables (Pot A, 4–20 mA, 0-5 V and Speed Curve). Limits for schedule A and schedule B are separate. 76 Woodward
Manual 26263
IC-920/-922 Ignition Controller with ServLink
Manual Timing Range Counterclockwise—Timing, in degrees, relative to TDC, when potentiometer is rotated fully CCW. Limits for schedule A and schedule B potentiometers (Pot A and Pot B) are separate. Clockwise—Timing, in degrees, relative to TDC, when potentiometer is rotated fully CW. Limits for schedule A and schedule B potentiometers (Pot A and Pot B) are separate.
Analog Input No Analog Input—Check to ignore the analog input in any timing scheme. Analog Input 4–20 mA—Check to use the 4–20 mA analog input signal in a timing scheme. Timing varies linearly between the 4 and 20 mA settings. Analog Input 0–5 Vdc—Check to use the 0–5 Vdc analog input signal in a timing scheme. Timing varies linearly between the 0 and 5 Vdc settings. Timing at 4 mA—This is the Timing OFFSET to be applied to the manual ignition timing setting of Pot A or Pot B (whichever is configured and selected) with 4 mA applied to the analog input. This is NOT an absolute timing setting. Timing at 20 mA—This is the Timing OFFSET to be applied to the manual ignition timing setting of Pot A or Pot B (whichever is configured and selected) with 20 mA applied to the analog input. This is NOT an absolute timing setting. Signal Loss Timing—This is the Timing OFFSET to be applied to the manual ignition timing setting of Pot A or Pot B (whichever is configured and selected) if the mA analog input is failed. This is NOT an absolute timing setting. Timing at 0 Vdc—This is the Timing OFFSET to be applied to the manual ignition timing setting of Pot A or Pot B (whichever is configured and selected) with 0 Vdc applied to the analog input or if the Vdc analog input is failed. This is NOT an absolute timing setting. Timing at 5 Vdc—This is the Timing OFFSET to be applied to the manual ignition timing setting of Pot A or Pot B (whichever is configured and selected) with 5 Vdc applied to the analog input. This is NOT an absolute timing setting.
Include Analog Input in Schedule A—Check to include the analog input as part of Schedule A timing scheme. The analog input offsets are combined (±) with other offset. Schedule B—Check to include the analog input as part of Schedule B timing scheme. The analog input offsets are combined (±) with other offset.
Speed Curve Speed—List of engine speeds for each ignition timing breakpoint. Up to 5 breakpoints can be entered. Engine speeds must be entered in increasing order. Timing—This is the Timing OFFSET to be applied to the manual ignition timing setting of Pot A or Pot B (whichever is configured and selected) for the adjacent speed setting. This is NOT an absolute timing setting. Units—Select either Advance or Retard for applying the timing offset setting.
Woodward
77
IC-920/-922 Ignition Controller with ServLink
Manual 26263
Include speed curve in Schedule A—Check to include the speed curve as part of Schedule A timing scheme. The speed curve offsets are combined (±) with other offset. Schedule B—Check to include the speed curve as part of Schedule B timing scheme. The speed curve offsets are combined (±) with other offset.
Speed Switch 1 Trip Point 1—Speed at which the Trip output is activated. Can be set normally opened or normally closed. Hysteresis 1—Amount of rpm below the Speed Switch Trip Point RPM needed to reset the output. Normally Open—Check to make output open to ground below the trip point. Normally Closed—Check to make output closed to ground below the trip point.
Engine Control Shutdown if maximum misfire rate is exceeded—Check to enable a maximum misfire rate shutdown. Maximum Misfire Rate—The number of misfires per second that is permissible before the engine shuts down due to excessive misfire.
Safety Overspeed—The rpm at which the ignition will shut down if exceeded. This setting must not be set to 0 rpm. Fuel Shutoff Threshold—This is essentially a programmable ‘Run’ speed setting that governs operation of the Contact A (Run/Stop) input. Fuel shutoff threshold is rendered inoperable when the Contact A input is not connected. The Contact A (Run/Stop) enables or disables the primary outputs. • Below the fuel shutoff threshold speed but above 30 rpm (approx.), the primary outputs will fire or stop firing each time the Run/Stop Contact is opened to ground (Run) or closed to ground (Stop). • Above the fuel shutoff threshold speed the primary outputs will stop firing when the Run/Stop Contact is closed to ground and will not fire again when the contact is opened until the engine has come to a full stop (zero rpm is sensed) and the engine is re-started. • Above the fuel shutoff threshold speed the primary outputs will fire if the Run/Stop Contact was closed to ground then opened for the first time. This allows engine starting when the fuel shutoff threshold speed is set below cranking speed. • Typically the fuel shutoff threshold speed is set above cranking speed but below minimum or idle speed. Start Energy • Speed Threshold—The engine rpm, below which, the Start Energy Level is active. • Energy Level—The energy level used when the engine rpm is below the Start Energy Speed Threshold.
78
Woodward
Manual 26263
IC-920/-922 Ignition Controller with ServLink
CAN without J1939 Versions Write values through the CAN Port—Enabling CAN write values makes the discrete and analog inputs inactive. This should NOT be checked for simply monitoring the IC-920/-922 with a CANbus device (read only). This should be checked to write values to the IC-920/-922 with a CANbus device (read/write) and to ignore the discrete and analog inputs. CAN Identifier—Used only for CAN communication. Must be set at 2 when used with the D-1 Display OR it must match the CAN master setting.
CAN on J1939 Versions J1939 CAN control enabled—If using the IC-92x in a system with a J1939 CANbus, this must be enabled for any CAN communication. If it is disabled, there is no CAN communication. J1939 Diagnostic Priority—Used only for CAN communication. Allows the priority of the Diagnostic message to be set to an appropriate level for the CAN bus system.
Modbus on J1939 Versions Modbus RTU Slave address—Default is 2 and that is what is required for a CTC Modbus display. The valid range is 2–200. Modbus Mode Enable—Default is Disabled, and this only needs to be enabled if a Modbus display is connected to the RS-232 port. Modbus Write Enable— Default is Disabled, and this only needs to be enabled if using Modbus to change tunables.
Monitor Tunables Edit Graph Levels—Password protected. Used to edit energy failure and alarm level settings associated with the Energy Levels bar graph display. Edit Energy Control—Password protected. Used to set the Manual Energy Set Point. Change Configuration—Password protected to download. Used to change the control configuration in the IC-920/-922 Service Tool. The configuration may be edited and saved to a file without the password. Edit Timing Offsets—Password protected. Used to edit individual cylinder timing offsets. Set to zero to disable an offset.
NOTE The Alarm Output is hard coded and not tunable.
Woodward
79
IC-920/-922 Ignition Controller with ServLink
Manual 26263
Appendix C. Modbus Addresses The following tables are available Modbus addresses. The 1st table are addresses that were set up to be compatible with a D-1 display. D-1 Compatible Modbus Addresses Function Modbus Code Address
Content (Read Only from Input and Holding Registers)
3,4
1
reserved
3,4
2
Header
3,4
3
Ignition Error Status Bits 1-16
See Error Status Table
3,4
4
Ignition Error Status Bits 17-32
See Error Status Table
3,4
5
Ignition Error Status Bits 33-48
See Error Status Table
3,4
6
reserved
3,4
7
reserved
3,4
8
reserved
3,4
9
Ignition Output Energy Channel 1
0.10%
3,4
10
Ignition Output Energy Channel 2
0.10%
3,4
11
Ignition Output Energy Channel 3
0.10%
3,4
12
Ignition Output Energy Channel 4
0.10%
3,4
13
Ignition Output Energy Channel 5
0.10%
3,4
14
Ignition Output Energy Channel 6
0.10%
3,4
15
Ignition Output Energy Channel 7
0.10%
3,4
16
Ignition Output Energy Channel 8
0.10%
3,4
17
Ignition Output Energy Channel 9
0.10%
3,4
18
Ignition Output Energy Channel 10
0.10%
3,4
19
Ignition Output Energy Channel 11
0.10%
3,4
20
Ignition Output Energy Channel 12
0.10%
3,4
21
Ignition Output Energy Channel 13
0.10%
3,4
22
Ignition Output Energy Channel 14
0.10%
3,4
23
Ignition Output Energy Channel 15
0.10%
3,4
24
Ignition Output Energy Channel 16
0.10%
3,4
25
Ignition Output Energy Channel 17
0.10%
3,4
26
Ignition Output Energy Channel 18
0.10%
3,4
27
Ignition Output Energy Channel 19
0.10%
3,4
28
Ignition Output Energy Channel 20
0.10%
3,4
29
Ignition Output Energy Channel 21
0.10%
3,4
30
Ignition Output Energy Channel 22
0.10%
3,4
31
Ignition Output Energy Channel 23
0.10% 0.10%
3,4
32
Ignition Output Energy Channel 24
3,4
33
Ignition Type
Units
Remarks
"1900"
Woodward IC-92X Modbus Identifier
90,91,92 possible values
3,4
34
Software Version
0.01
3,4
35
Ignition Running Hours
1 hour
3,4
36
Actual Timing
.1 degree
3,4
37
Ignition Status Bits
0-7
3,4
38
Actual Speed
1 rpm
3,4
39
4-20 mA
0.1 mA
80
See table for bit representation
Woodward
Manual 26263
IC-920/-922 Ignition Controller with ServLink
Error and Status Table Unless noted in the Remarks column, 0 is a fault, and 1 is fault not active. Function Modbus Code Address
Content (Read Only from Input and Holding Registers)
Modbus Remarks Word Bit Position
3,4
Ignition Error Status Bits 1-16
0
E2PROM Checksum Error
1
Reserved
2
Reserved
3
Global, Individual Timing or Energy Level out of Range
4
Reserved
5
Selftest Shutdown
6
Open Primary Rate Exceeded
7
Wait for 0 RPM
8
1 = Go; 0 = No Go
9
Error Missing Ring Gear Signal
10
Error Missing Reset Signal
11
Error Missing Camshaft Signal
3,4
3,4
3
4
5
Woodward
Ignition Error Status Bits 17-32
Ignition Error Status Bits 33-48
12
Error Number of Gear Teeth
13
Unknown Engine Application Code
14
Overspeed Shutdown
15
No Configuration at Self Test
0
Open Primary, Channel 9
1
Open Primary, Channel 10
2
Open Primary, Channel 11
3
Open Primary, Channel 12
4
Open Primary, Channel 13
5
Open Primary, Channel 14
6
Open Primary, Channel 15
7
Open Primary, Channel 16
8
Open Primary, Channel 1
9
Open Primary, Channel 2
10
Open Primary, Channel 3
11
Open Primary, Channel 4
12
Open Primary, Channel 5
13
Open Primary, Channel 6
14
Open Primary, Channel 7
15
Open Primary, Channel 8
0
Warning Missing Ring Gear Signal
1
Warning Missing Reset Signal
2
Warning Missing Camshaft Signal
3
Reserved
4
Reserved
5
Reserved
6
Reserved
7
Reserved
8
Open Primary, Channel 17
9
Open Primary, Channel 18
81
IC-920/-922 Ignition Controller with ServLink Function Modbus Code Address
3,4
37
Content (Read Only from Input and Holding Registers)
Ignition Status Bits 0-2
Manual 26263
Modbus Remarks Word Bit Position 10
Open Primary, Channel 19
11
Open Primary, Channel 20
12
Open Primary, Channel 21
13
Open Primary, Channel 22
14
Open Primary, Channel 23
15
Open Primary, Channel 24
0
Ignition OK = 1; Not OK = 0
1
Firing = 1; Not Firing = 0 1 = Schedule B Active; 0 = Schedule A Active
2
Extended Modbus Addresses Function Code
Modbus Address
Content (Input/Holding Register Read Units Only)
Remarks
3,4
100
Number of Teeth
3,4
101
Number of Cylinders
3,4
102
Ignition Status 1
Contact Woodward
3,4
103
Ignition Status 2
Contact Woodward
3,4
104
Misfires per second
3,4
105
Odd Misfiring Cylinder
See table
3,4
106
Odd Delayed Misfiring Cylinder
See table
3,4
107
Even Misfiring Cylinder
See table
3,4
108
Even Delayed Misfiring Cylinder
See table
3,4
109
Contact A Status
1 = Closed/No firing; 0 = Open, Normal operation
3,4
110
Contact B Status
1 = Closed, Sched B active if enabled; 0 = Open, Sched A
3,4
111
"0-5 Volt input"
.01 Volts
3,4
112
Timing Degrees 0-5 Volt
0.01 Deg
Not updated if 0-5 disabled
3,4
113
Timing Degrees 4-20 ma
0.01 Deg
Not updated if 4-20 disabled
3,4
114
Timing Degrees Speed Curve
0.01 Deg
3,4
115
Timing Degrees Active Potentiometer
0.01 Deg If # teeth is different than programmed, this is what the 920 detects.
3,4
116
Number of teeth at error
3,4
117
Flash Checksum
3,4
118
Serial Number Digit 0
1 byte ASCII
3,4
119
Serial Number Digit 1
1 byte ASCII
3,4
120
Serial Number Digit 2
1 byte ASCII
3,4
121
Serial Number Digit 3
1 byte ASCII
3,4
122
Serial Number Digit 4
1 byte ASCII
3,4
123
Serial Number Digit 5
1 byte ASCII
3,4
124
Serial Number Digit 6
1 byte ASCII
3,4
125
Serial Number Digit 7
1 byte ASCII
3,4
126
Control Type
82
920 or 922
Woodward
Manual 26263
IC-920/-922 Ignition Controller with ServLink
Function Code
Modbus Address
Content (Input/Holding Register Read Units Only)
3,4
127
Energy Failed Set Point
1%
3,4
128
Energy Warn Set Point
1%
3,4
129
Energy High High Set Point
1%
3,4
130
Energy Low Low Set Point
1%
3,4
131
Energy High Set Point
1%
3,4
132
Energy Low
1%
Address
bit
Misfire cylinder
105,106
0
1
1
3
2
5
3
7
4
9
5
11
6
13
7
15
8
17
9
19
10
21
11
23
0
2
1
4
2
6
3
8
4
10
5
12
6
14
7
16
8
18
107, 108
9
20
10
22
11
24
Remarks
Read and Write Modbus Addresses Function Code
Modbus Address
Content (Holding Register - Read/Write)
Units
Range
3,4
500
Even Energy Set Point
% as Integer
10-100
3,4
501
Odd Energy Set Point
% as Integer
10-100
3,4
502
Start Energy RPM
rpm
3,4
503
Start Energy Level
% as Integer
Woodward
10-100
83
Declarations
IC-920/-922 Control Specifications Woodward Part Numbers:
J1939CAN Woodward Part Numbers:
Power Consumption IC-920: IC-922:
8408-0702 (IC-920, 3-hole gland plate, 20 output) 8408-0724 (IC-920, 3-hole gland plate, 24 output) 8408-0802 (IC-922, 3-hole gland plate, 20 output) 8408-0725 (IC-920, 3-hole gland plate, 20 output) 8408-0726 (IC-920, 3-hole gland plate, 24 output) 8408-0727 (IC-922, 3-hole gland plate, 20 output) 24 V operation: 18–32 Vdc 5 A max (6 A slow blow fuse in each power line) 10 A max (12 A slow blow fuse in each power line)
Notes: 1. Average current is dependent on the number of cylinders, input power, energy level, and engine speed. 2. Peak current is dependent only on energy level; 100% energy = 30 A peak Trigger Input
Reset Input CAM Input
Discrete Inputs (Contacts A & B)
Process Input Trip Outputs (2 solid-state outputs) Permissive Start (solid-state output) Communications Ports Ambient Operating Temperature Storage Temperature Humidity Equipment Classification Air Quality Installation Overvoltage Ingress Protection Maximum Altitude
Variable reluctance (passive) 6V peak to peak (2.1Vrms) min., 80 V peak to peak (28.3Vrms) max., 10 Hz to 10 kHz Same as Trigger Input Active Inductive type or Hall Effect type, 18–32 Vdc supply voltage from IC-920/-922, PNP (high side switch) or NPN (low side switch) @20 mA accepted, 0–10 kHz Switch to ground for activation. Open switch for deactivation. Switch characteristics: Von < 0.5 V @ 3 mA relative to input power minus (conducting state), Voff = 6 V relative to input power minus (blocking state) 4–20 mA or 0–5 V open drain 32 V max., 100 mA max. open drain 32 V max., 250 mA max. CAN, RS–232 –40 to +70 °C (–40 to +158 °F) –40 to +85 °C (–40 to +185 °F) 95%, no moisture condensation Class 1 (grounded equipment) Pollution Degree II Category II IP54 3000 m (9843 ft)
Regulatory Compliance European Compliance for CE Mark: EMC Directive
Low Voltage Directive
ATEX Potentially Explosive Atmospheres Directive
North American Compliance: CSA
Declared to 89/336/EEC COUNCIL DIRECTIVE of 03 May 1989 on the approximation of the laws of the member states relating to electromagnetic compatibility. Declared to the 73/23/EEC COUNCIL DIRECTIVE of 19 February 1973 on the harmonization of the laws of the Member States relating to electrical equipment designed for use within certain voltage limits. Declared to 94/9/EEC COUNCIL DIRECTIVE of 23 March 1994 on the approximation of the laws of the Member States concerning equipment and protective systems intended for use in potentially explosive atmospheres. EEx nA IIC T4
CSA Certified for Class I, Division 2, Groups A, B, C, & D, T4 at 70 °C Ambient for use in Canada. Certificate 1486084
This product is certified as a component for use in other equipment. The final combination is subject to acceptance by CSA International or local inspection.
We appreciate your comments about the content of our publications. Send comments to: [email protected] Please include the manual number from the front cover of this publication.
PO Box 1519, Fort Collins CO 80522-1519, USA 1000 East Drake Road, Fort Collins CO 80525, USA Phone +1 (970) 482-5811 • Fax +1 (970) 498-3058
Email and Website—www.woodward.com Woodward has company-owned plants, subsidiaries, and branches, as well as authorized distributors and other authorized service and sales facilities throughout the world. Complete address / phone / fax / email information for all locations is available on our website.
06/7/F